Oil painting is a beautiful and complex medium that has been celebrated by many artists throughout history. However, even experienced painters may face certain challenges when working with oils, including flaking, tenting, and other common issues that can compromise the integrity and aesthetic quality of a piece of art.
Understanding these issues is crucial for artists seeking to create long-lasting, captivating artwork with oil paints.
Flaking occurs when the paint layers begin to chip away from the canvas or underlying layers. This can be caused by a variety of factors such as improper application, inadequate adhesion, or using incompatible materials.
Tenting is another common issue where the paint layer lifts and forms a ridge, typically due to shrinkage or tension. Both flaking and tenting can lead to unsightly damage, making it essential for artists to learn how to avoid and address these challenges effectively.
In this article, we will delve into the causes and solutions for these common oil painting issues, as well as explore best practices that can help artists achieve optimal results in their work.
By understanding the factors that contribute to flaking, tenting, and other complications, artists can make informed decisions that enhance the longevity, beauty, and effectiveness of their creations, ensuring that their artistic visions are fully realized.
Causes of Common Oil Paint Issues
Environmental Factors
Environmental factors play a significant role in causing issues with oil paints. Moisture is one of the main culprits, as high humidity can affect the adhesion of the paint film to the surface, leading to flaking and cracks. Temperature extremes, like excessive heat or cold, can also impact the drying process, causing unevenness and potential cracking in the paint.
Poor Surface Preparation
Inadequate surface preparation can lead to multiple issues with oil paints. The surface should be cleaned thoroughly, free from dust, dirt, and oil residues. Primer or grounds need to be applied correctly to create a proper foundation for the paint. If the primer is not properly applied, the paint may not adequately adhere to the surface, resulting in flaking or cracking.
- Wall preparation: Ensure the wall is clean and dry.
- Application of grounds: Choose the right primer or ground for your painting surface.
Paint Mixing and Compatibility
Another cause of problems in oil paintings is the mishandling of paints during the mixing process. It is essential to respect the fat-over-lean principle, which means using layers of oil paint with progressively higher oil content. This practice helps to avoid cracks in the paint film. Mixing incompatible paint or varnishes can also lead to issues, as they can cause irregular drying or unwanted chemical reactions.
- Oil content: Use layers of paint with progressively higher oil content.
- Compatibility: Ensure the compatibility of paints, mediums, and varnishes used.
Specific Oil Paint Problems
Flaking
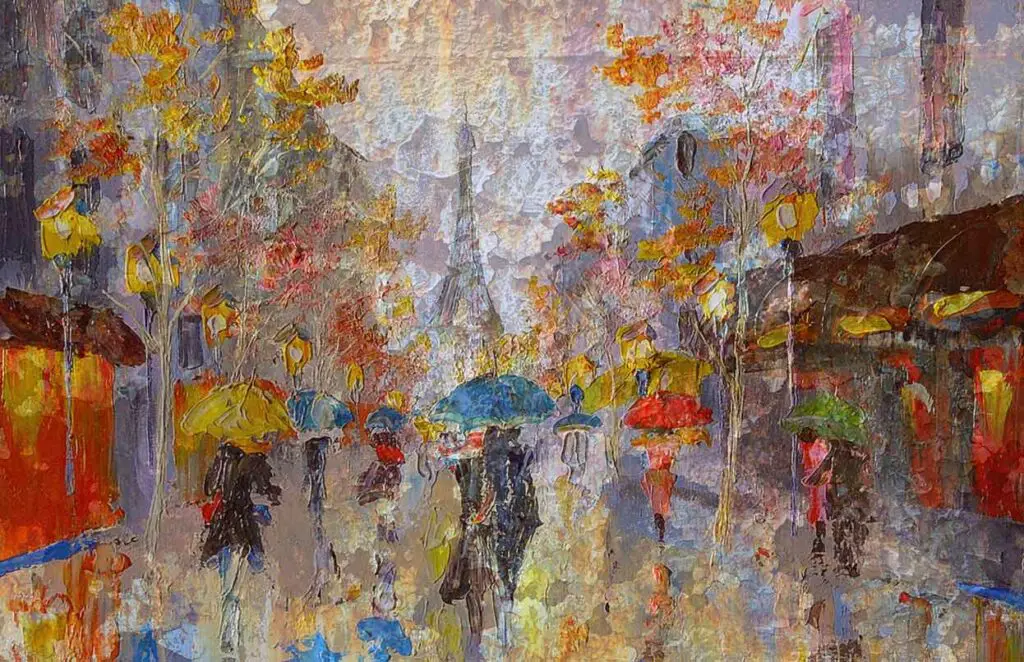
Flaking occurs when the paint layer separates from the canvas, resulting in loose, irregular fragments of paint. This can be caused by poor adhesion, aging, or exposure to environmental factors such as moisture and sunlight. To prevent flaking, ensure proper surface preparation and use high-quality, compatible materials in your oil painting.
Tenting
Tenting is the lifting of paint from the canvas due to moisture or improper application, creating tension and a tent-like shape. To avoid tenting, ensure the surface is clean, dry, and adequately primed before applying oil paint layers.
Cracking and Checking
Cracking and checking are characterized by lines or fissures appearing on the paint layer. Causes may include fluctuations in temperature, humidity, or rapid drying of the paint. To minimize cracking, apply the paint evenly and avoid extreme environmental conditions while the oil paint is curing.
Peeling and Bubbling
Peeling and bubbling often result from moisture between the canvas and paint layer, leading to loss of adhesion or blistering. To prevent these issues, thoroughly dry the canvas and ensure it is properly primed before starting your oil painting.
Alligatoring
Alligatoring is the appearance of a pattern of cracks resembling an alligator’s skin. It is often caused by the top layer of paint drying faster than the bottom layer. To avoid alligatoring, apply paint coats evenly and allow adequate drying time between layers.
Wrinkling and Running
Wrinkling and running occur when the paint is applied too thickly or unevenly, leading to an inconsistent layer of paint. To prevent these issues, apply paint in thin, even layers and use a brush designed specifically for oil paints.
Yellowing and Blooming
Yellowing is the gradual discoloration of the paint due to aging while blooming refers to a whitish haze that forms on the surface. Both issues can result from factors such as humidity, sunlight exposure, and poor paint quality. To mitigate yellowing and blooming, store your oil paintings in a controlled environment and use high-quality materials.
Efflorescence and Chalking
Efflorescence is the formation of a powdery, white substance on the exterior paint surface caused by alkalis and salts in the canvas coming to the surface. Chalking, on the other hand, is a powdery, white appearance caused by the paint binder breaking down. To minimize efflorescence and chalking, use high-quality primers and paints and ensure proper surface preparation.
Sagging and Flashing
Sagging refers to the downward movement of paint while still wet, often seen as visible drips or streaks after drying. Flashing is the uneven sheen on the painted surface, giving it an inconsistent look. To prevent sagging and flashing, apply paint in even, thin layers and use high-quality paint that has good leveling properties.
Mildew and Staining
Mildew is fungal growth on the paint surface, while staining occurs when paint changes color or darkens over time due to exposure to moisture, oils, or environmental factors. Proper surface preparation, including cleaning and priming, can help prevent mildew and staining. Additionally, using mildew-resistant paint and storing oil paintings in a dry, well-ventilated environment can also reduce the risk of these problems.
Prevention and Maintenance
Proper Surface Preparation
To prevent flaking, tenting, and other common oil paint issues, proper surface preparation is crucial. Before applying oil paint, ensure that the surface is clean, dry, and free from any contaminants such as dust, grease, or wax. If needed, use a suitable filler to repair cracks or uneven areas. It’s important to create a suitable foundation for the paint layers, providing optimal adhesion to the surface.
Appropriate Paint Choice
Selecting the appropriate paint is vital for avoiding paint problems. Make sure to use a high-quality oil paint specifically formulated for the intended surface. It’s essential to consider factors like the paint’s drying time and the desired finish when making your selection. Using an appropriate primer, if needed, can help improve adhesion and durability, while using an appropriate emulsion will ensure proper consistency and performance.
Optimal Painting Conditions
Painting in optimal conditions contributes significantly to preventing common oil paint issues. Proper ventilation helps to speed up drying time and prevents trapped moisture, which can result in flaking or tenting.
While painting, avoid direct sunlight to prevent rapid drying and maintain a consistent temperature and humidity level. Implementing these measures will create an environment conducive to seamless paint application and long-lasting results.
Routine Inspection and Care
Finally, perform routine inspections to identify and tackle any paint problems early on. Regularly check your painted surfaces for signs of deterioration such as scales, cracks, or peeling.
Swiftly address the issues to prevent more extensive damage. Proper maintenance, including cleaning vents and protecting surfaces from moisture, will contribute to your oil paint’s longevity.
By following these best practices, you’ll successfully prevent flaking, tenting, and other common issues with oil paints, ensuring a beautiful and durable result.
Restoration and Preservation Techniques
Assessing the Damage
Before beginning any restoration or conservation process, it’s essential to assess the damage carefully. Examine the painting for signs of flaking, tenting, and cracks. Also, look for any evidence of corrosion or salt deposits, which can weaken or alter the colors of the oil paint.
Removing Incompatible Materials
After assessing the damage, remove any incompatible materials such as old caulking or low-quality paint layers as they may compromise the integrity of the painting. These materials can sometimes cause further issues like checking or tenting.
Reversing Environmental Damage
Addressing environmental damage, such as salt deposit buildup or corrosion, requires specific techniques. One method involves using a lining procedure to remove any deposited salts, while another might involve facing or using “cookies” (small cushions) to support the affected paint layers during the conservation process.
Patching and Filling Cracks
To repair cracks, use a high-quality oil-based paint or caulking material that matches the original paint in texture, composition, and color. Patch the cracks using a compatible filler, ensuring a smooth surface for proper repainting.
| Type of Filler | Compatible with |
|---|---|
| Oil-based caulking | Oil paints |
| High-quality paint | Compatible with original paint |
Proper Repainting
When repainting damaged areas, use high-quality paint that matches the original color, composition, and texture. Ensure that the new paint is compatible with the original to prevent future issues, such as flaking or checking.
- Confident: Trust in the proven methods of restoration and preservation
- Knowledgeable: Use the most suitable techniques for each specific issue
- Neutral: Offer an unbiased evaluation of the damage and proper solutions
- Clear: Ensure the steps and processes are easily understood
Safety Considerations and Precautions
When working with oil paints, it is essential to prioritize safety and consider various measures necessary to prevent accidents or damage. The following sub-sections guide you through the aspects of safety to be kept in mind while handling oil paints.
Proper Protective Equipment
Wearing appropriate protective gear as you work with oil paints helps avoid direct contact with harmful chemicals and substances. The primary protective equipment that should be used includes:
- Goggles: Shield your eyes from splashes or accidental contact with paint and paint solvents.
- Rubber gloves: Protect your hands from harmful solvents and chemicals present in the paints.
Careful Removal of Paint
When dealing with paint cracks, peeling paint, or incompatible paint, cautious removal of paint layers is crucial. Safely tackle these issues by following the steps below:
- Put on safety goggles and rubber gloves before beginning the removal process.
- Use a scraper or wire brush to remove loose or peeling paint layers gently.
- For stubborn areas, prepare a warm water solution and apply generously using a sponge before scraping the paint.
- Sand the surface down until smooth, ensuring any remnants of peeling paint or paint cracks are removed.
Safe Chemical Use
The presence of fungus and the need for surface treatment on timber or interior paint may require a chemical application. Adhere to a few safety guidelines to use chemicals without causing damage:
- Ensure proper ventilation in the workspace by opening windows and using exhaust fans when working with strong chemicals.
- Read the manufacturer’s instructions and safety guidelines on the chemical product label.
- Avoid mixing chemicals without proper knowledge or guidance, as it may lead to adverse reactions or reduced effectiveness.
By observing these safety considerations and precautions, you can effectively manage common issues with oil paints while maintaining a secure working environment.
Frequently Asked Questions
How to fix cracked oil paint?
Cracked oil paint, also known as “crazing,” is often due to the paint layers drying at different rates or mixing incompatible materials. To fix this issue, you can carefully remove the cracked paint using a painting knife and then fill the area with fresh paint, making sure to use compatible materials. Allow the area to dry completely before varnishing.
What causes flaking in oil paintings?
Flaking in oil paintings can result from various factors, including incorrect support, insufficient adhesion between the paint layers, or exposure to environmental factors like humidity and temperature changes. To prevent flaking, use a suitable primer, apply the paint in thin layers, and store the artwork in a stable environment.
How to repair a dented oil painting?
To repair a dented oil painting, first, remove the canvas from the stretcher bars. Then, place the canvas on a flat surface and lightly mist the back of the dented area with water. Finally, use a hairdryer to heat the area until the dent disappears gently. Allow the canvas to dry before re-stretching it.
How to touch up an old oil painting?
Touching up an old oil painting involves cleaning the surface, filling in any cracks or flaked areas, and then retouching with compatible materials.
Use a cotton swab dipped in a mild art cleaner to clean the surface, and gently lift any flaking paint with a soft brush. Once the damaged areas are repaired, mix the appropriate paint color and carefully touch up the artwork with a small brush.
Can you roll an oil painting without damage?
Rolling an oil painting is not ideal, as it can cause the paint layers to crack or become disjointed. However, if you must transport the artwork, roll the painting with the paint side facing out around a large-diameter tube to minimize the risk of damage. Cover the painting with acid-free paper or glassine before rolling.
Is there a way to cover up a painted canvas?
Yes, you can cover up a painted canvas by applying a layer of gesso or a thick acrylic-based primer. Allow the primer to dry completely, then sand the surface lightly to create a smooth texture.
You can now paint over the primed surface with new artwork. Make sure the original paint is well-adhered and compatible with the primer to avoid any issues.