Creating your own oil paint can be a rewarding experience, as it offers a deeper connection to the artistic process and allows for customization of color, texture, and consistency. Making your own oil paint is not only a cost-effective alternative to store-bought paint, but it also provides an opportunity for artists to have greater control over their work.
The process of making oil paint involves mixing pigments with a drying oil, such as linseed or walnut oil, which will create the desired consistency and allow the paint to dry over time. Knowing the fundamental steps and understanding the properties of the materials, artists can experiment with various techniques to achieve their desired results. Learning to make your own oil paint can be an exciting opportunity to enhance your creative journey.
Understanding Pigments
Pigments are the key ingredients in making oil paint. They are the substances that provide color to the paint, and are made from a variety of materials, both natural and synthetic. There are many types of pigments available, such as ultramarine blue and natural pigments derived from minerals, plants, and insects.
Toxic Pigments
It is important to understand that some pigments can be toxic and pose health risks. Artists should always take proper precautions when handling pigments, especially those containing heavy metals or toxic elements.
Some toxic pigments to be aware of include:
- Lead pigments: Lead-based pigments, such as lead white and Naples yellow, are highly toxic and should be used with caution. Due to their toxicity, these pigments have been largely replaced by safer alternatives in the paint industry.
- Cadmium pigments: Colors like cadmium yellow, cadmium orange, and cadmium red are made from cadmium compounds, which are considered toxic. Safer alternatives to these pigments have been developed, but cadmium pigments still remain popular among artists due to their vibrant colors and excellent lightfastness.
- Cobalt pigments: Cobalt blue, cerulean blue, and cobalt violet pigments are derived from cobalt salts and can pose health risks. These pigments are popular for their brilliant hues and excellent lightfastness. When using cobalt pigments, take care to avoid ingesting or inhaling any pigment particles.
When working with toxic pigments, always use proper personal protective equipment, such as gloves, masks, and ventilation systems, to minimize the risk of exposure. Additionally, it is crucial to follow the proper disposal methods for any paint materials containing toxic pigments, as improper disposal can harm the environment.
By understanding the properties and potential risks of different pigments, artists can make informed decisions about the materials they choose to use in their oil paint creations. Always remember that safety should be a top priority when working with potentially harmful pigments, and adopt best practices to ensure a safe and enjoyable painting experience.
Drying Oils and Their Properties
Drying oils are essential components in oil paint production. They play a critical role in the curing and hardening process of the paint, as they undergo oxidation and polymerization when exposed to air. These oils contribute to the paint’s consistency, workability, and can impact the paint’s gloss and drying time.
Linseed oil is the most common drying oil used in oil paint. It is derived from flax seeds and has a high oil absorption, making it suitable for various pigments. Linseed oil offers a well-balanced drying time and imparts a durable, flexible film on the painted surface. It is compatible with most other oils and additives enhancing their properties. However, it has a tendency to yellow over time, which may affect the color integrity of the paint.
Walnut oil is another popular drying oil with a low oil absorption rate and relatively faster drying time compared to linseed oil. It is less prone to yellowing as well, making it suitable for light-colored paints. Additionally, walnut oil is less viscous, allowing for smoother brushwork and enhanced paint flow.
Poppy seed oil is characterized by its slow drying time, making it ideal for painters who require more time working on their canvas. The advantage of using poppy seed oil lies in its resistance to yellowing. Its use is mainly recommended for white and pale colors.
Safflower oil is also a slow-drying oil with similar properties to poppy seed oil. It is less likely to yellow and is ideal for pale colors. However, it tends to be a bit more slippery, which might pose a challenge for some artists to control the flow of the paint.
Choosing the right drying oil comes down to personal preferences and specific requirements for an artist’s work. Factors to consider when selecting a drying oil include:
- Drying time: Faster drying oils allow for more rapid layering, while slower drying oils permit extended workability.
- Yellowing tendency: For light and pale colors, using a drying oil with less yellowing potential is crucial.
- Viscoity: The thickness of the oil can affect the flow and brushwork of the paint.
In summary, drying oils impact the properties of oil paint, and understanding their characteristics can help artists choose the best oil for their needs. Linseed, walnut, poppy seed, and safflower oils are widely used, each having unique attributes that cater to different artistic techniques and preferences.
Mixing Pigments and Drying Oils
To create your own oil paint, begin by combining pigments and drying oils. First, choose a suitable working surface for mixing, such as a grinding slab. A glass or marble slab is ideal since it is non-absorbent and easy to clean.
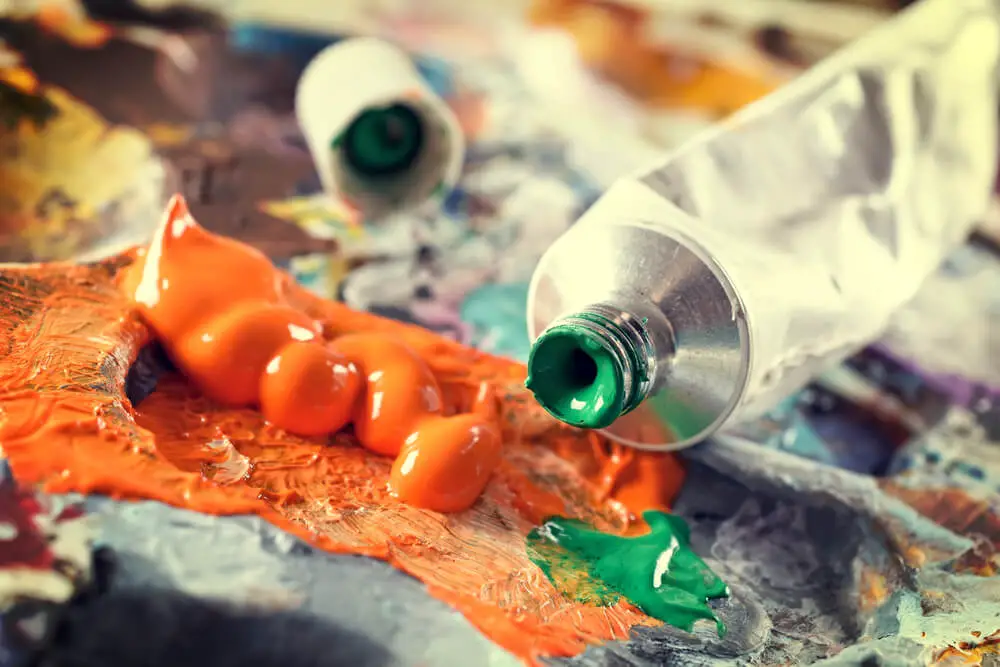
Next, select your pigments and drying oils. Pigments come in various forms, including powders, lumps, and pastes. For drying oils, linseed, safflower, and walnut oil are popular choices.
Begin by placing a small amount of pigment on the grinding slab. Using a palette knife, mix in a little drying oil with the pigment. Gradually add more oil until the desired consistency is achieved. The ideal consistency should be smooth, buttery, and homogeneous. It is important not to add too much oil, as this can make the paint runny and compromise its quality.
Once the proper consistency is reached, use a muller to further refine the mixture. A glass muller is often employed for this purpose. Place the muller on the mixture and use circular motions to grind the pigment and oil together. This process helps break down any remaining lumps in the pigment and ensures a smooth, evenly mixed paint.
If you are working with multiple pigments, make sure to clean your muller and palette knife between color mixtures. This is essential to prevent cross-contamination and maintain the proper color in each paint mixture. Also, avoid overgrinding your pigments, as this can alter their color and texture.
The texture of your homemade oil paint can be adjusted by varying the amount of drying oil used in the mixture. For a more fluid paint, simply add more oil. Conversely, to create a thicker, more impasto-like paint, use less oil.
In summary, making your own oil paint requires careful attention to mixing pigments and drying oils. Use a grinding slab as your mixing surface, and experiment with various pigments and oils to achieve the desired consistency and texture. Employ a palette knife and muller for thorough mixing, ensuring a high-quality, custom-made paint for your artistic endeavors.
Creating Desired Consistency and Texture
To create the desired consistency and texture for your homemade oil paint, it’s essential to understand the balance between the pigment (fine powder) and the oil binder. The ideal consistency should be smooth, not too thick, and not too runny.
Begin by selecting a pigment powder, preferably a non-toxic one. Measure the pigment powder and pour it on a smooth surface such as a glass palette. Next, add a small quantity of oil – linseed oil is a common choice for oil paints. Using a palette knife, mix the fine powder and oil together. Keep adding oil in small increments until you achieve the perfect paint consistency.
Be mindful of the thickness when mixing oil paint. The general rule to follow is ‘fat over lean,’ which means that the upper layer of paint should contain more oil than the lower layers to prevent cracking. This is particularly helpful when you are layering multiple colors on your painting.
Avoid adding too much oil, as it might reduce the drying time and can make the paint more translucent. Remember that the drying time for oil paint might take longer than other types of paints, such as acrylics or watercolors. Patience is essential to obtain the best results.
The texture of oil paint can be altered using additives. To create a more transparent paint, you may add resins like damar or a solvent like turpentine. To create a thicker and more textured paint, add beeswax or other impasto mediums to your mixture.
Following these guidelines, you can confidently create your own oil paints with the desired consistency and texture for your masterpiece.
Storing and Packaging Oil Paint
When making your own oil paint, proper storage and packaging are essential to maintaining its quality and ensuring its longevity. Adequate storage techniques can help protect your paint from drying out, exposure to air and moisture, and potential contamination.
To store your handmade oil paint, you can use empty paint tubes. These are typically made of metal or plastic and can be easily found online or at art supply stores. When selecting an empty paint tube, look for one that seals tightly to prevent air exposure and has enough space to accommodate the amount of paint you have produced.
Filling oil paint tubes can be a bit messy but it is important to follow proper techniques to ensure paint quality is preserved. Begin by opening the empty tube and folding back the open end to create a wide opening. Using a palette knife or spatula, carefully scoop up your paint and transfer it into the tube. Fill the tube entirely, leaving only a small space at the top. Once filled, unfold the edges of the tube and flatten it out, pushing any remaining air out of the top opening. Finally, crimp the end of the tube with a pair of pliers to create a tight seal.
Adding a hand-painted label to your paint tube not only personalizes your creation but also makes it easy to identify the color and type of paint inside. Using a small brush and a contrasting paint color, make your label as simple or as elaborate as you’d like. Make sure to let the label dry completely before handling or storing the tube.
Here are a few additional tips to consider when storing and packaging your handmade oil paint:
- Store paint tubes in a cool, dry place away from direct sunlight.
- Keep tubes upright to prevent leakage or damage to the paint.
- Always ensure the cap is tightly closed after each use to maintain paint quality.
- Organize your paint tubes in a container or tray for easy access and to prevent accidental punctures.
By following these storage and packaging guidelines, you can help ensure that your homemade oil paint remains in optimal condition and is ready for your next artistic endeavor.
Safety Precautions While Making Oil Paint
When making your own oil paint, it’s essential to prioritize safety. Work in a well-ventilated area to prevent inhaling fumes or dust particles. Though the process doesn’t pose many risks, there are a few precautions you should take.
To protect your respiratory system, always wear a dust mask or a respirator. This shields you from inhaling harmful particles while working with powdery pigments. Some pigments contain toxic substances, so a mask is crucial for protection.
Handle toxic pigments with care. These include cadmiums, cobalts, and lead-based pigments. Wear gloves and avoid skin contact since certain pigments can be absorbed into the bloodstream through the skin. Additionally, always wash your hands after handling pigments.
When mixing pigments with oil, it’s common to use solvents like mineral spirits to thin the paint. These solvents emit unpleasant odors and can cause headaches or dizziness if inhaled over time. Ensure proper ventilation, avoid inhaling the fumes, and be mindful of open flames, as mineral spirits are flammable.
In conclusion, abiding by these precautions will ensure your safety while making oil paint:
- Wear a dust mask or respirator to protect your respiratory system
- Handle toxic pigments with care and always wear gloves
- Work in a well-ventilated area away from open flames when using mineral spirits
By considering these safety measures, you can confidently and safely create stunning oil paints to fuel your artistic endeavors.
Applying Homemade Oil Paint
When you’ve successfully created your homemade oil paint, it’s time to apply it to your painting surface. A gessoed canvas or primed canvas scraps are ideal for this purpose. Gesso is a white paint mixture that prepares the surface, ensuring proper adhesion of the oil paint to the canvas.
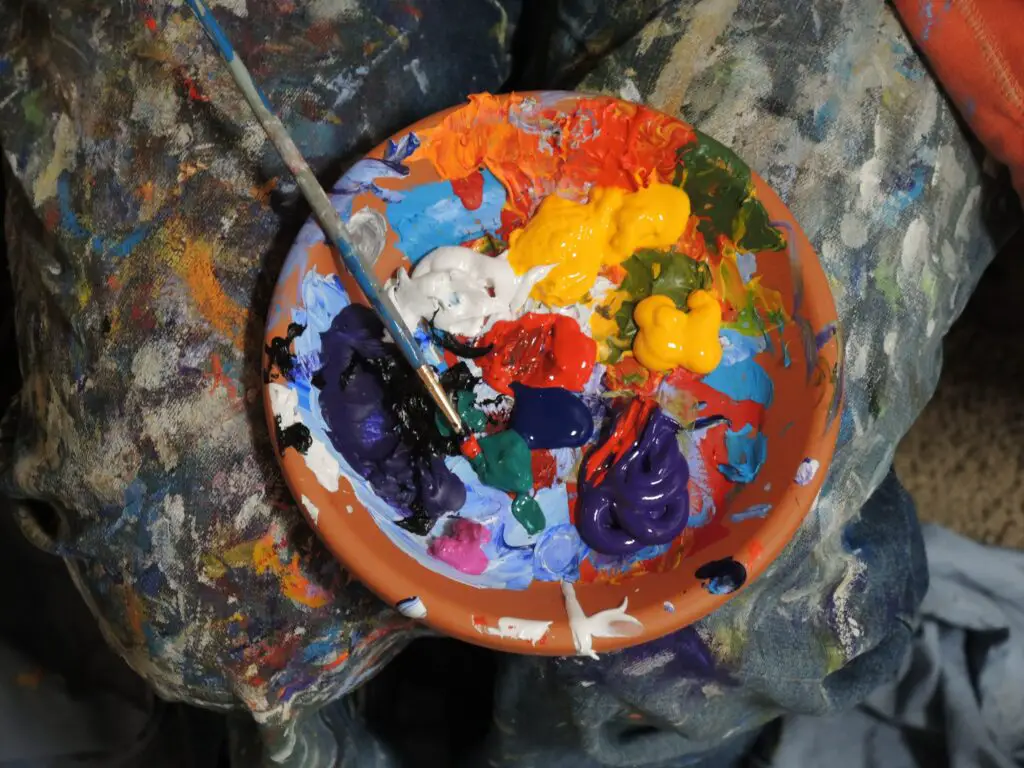
To begin your painting project, gather your supplies, including a palette, brushes, and a clean workspace. Disperse small amounts of your prepared oil paint onto the palette. Keep in mind that a little paint goes a long way, especially when working with oils.
When applying the homemade paint to the gessoed canvas, use your brush to pick up a small amount of color from the palette. Spread the paint softly across the canvas, creating a smooth and even layer. The thickness of your paint can be adjusted depending on your preferences and desired effects.
If you’re new to using oil paints, don’t worry too much about achieving perfect coverage on your first try. Oil paintings often benefit from applying multiple layers; allowing you to build up depth, texture, and color intensity over time. Be sure to allow each layer to dry thoroughly before adding the next. Drying times can vary depending on the paint consistency and environmental factors but can typically range from a few days to a week.
As you work on your painting, feel free to experiment with various brush sizes, shapes, and strokes. This will give you a greater understanding of how your homemade oil paint reacts with the surface and how it mixes with other colors. Use this knowledge to further customize and enhance your artwork.
Remember that homemade oil paint may appear different than store-bought equivalents. These differences can give your artwork unique characteristics that make it truly one-of-a-kind. By using your own paint, not only are you creating original artwork, but you are also gaining a deeper understanding of the materials and techniques that artists have used for centuries.
Alternatives to Traditional Oil Paints
There are several alternatives to traditional oil paints that can be used for various painting projects. These alternatives offer unique properties and benefits compared to oil paints.
Acrylic paint is a popular choice for those who want a fast-drying paint. It is water-based, which makes it easy to clean up and thin with water. Acrylic paint can be used on a variety of surfaces such as canvas, wood, paper, and more. The colors can be easily blended, and they dry to a matte finish.
Chalk paint is a type of decorative paint that gives a soft, chalky appearance. It is often used on furniture and to create distressed finishes. Chalk paint is water-based and can be easily mixed with water or a medium to create different effects. It can be used on various surfaces, including wood, metals, and glass.
Plaster of Paris is a versatile material that can be used as a paint base when mixed with pigments or coloring agents. It dries to a hard, plaster-like surface that can be sanded or polished. This paint option is suitable for a range of artistic and decorative purposes, especially for creating textured effects.
Latex paint is another water-based alternative to oil paint. It is known for its durability and flexibility, as well as for its easy application. Latex paint can be applied to multiple surfaces, including masonry, wood, and metal. It dries quickly, and its finish can range from flat to glossy, depending on the paint type.
Flour paint is an eco-friendly option that can be made at home using minimal ingredients, such as flour, water, and pigment. This paint is suitable for use on various surfaces and has a more natural, matte finish. It is known for being non-toxic, making it a popular choice for DIY enthusiasts and those conscious of the environment.
Iron sulfate can be used as a homemade alternative to more traditional paints. When combined with water and a binder, such as linseed oil or gum arabic, the resulting paint has a reddish-brown hue. Iron sulfate paint is commonly used to paint metals, such as gates and fences, as it has rust-resistant properties.
In conclusion, there are numerous alternatives to traditional oil paints that artists and DIY enthusiasts may consider using. These options provide different properties, finishes, and benefits depending on the desired result and the project type.
Tips for Working with Your Own Oil Paint
When making your own oil paint, having the right tools and following proper techniques can ensure successful results. Here are some tips to guide you in working with your own oil paint:
One of the most important tools for creating oil paint is a triple roll mill. This device helps evenly disperse pigment particles throughout the oil, ensuring a consistent color and texture. To use the triple roll mill, slowly add pigment to your oil and roll the mixture through the mill several times until it achieves a smooth, homogeneous consistency.
If you don’t have a triple roll mill, you can use a muller and glass slab as an alternative method for grinding pigments and mixing them with oil. Start by placing a small amount of pigment on the glass slab and add a few drops of oil. Using the muller, grind the pigment and oil together in a circular motion, gradually adding more pigment until you reach your desired color concentration. This process may take longer than using a triple roll mill, but it can still produce satisfactory results.
To ensure you’re using the correct proportions of pigment and oil, consider using a scale. Weighing your ingredients will allow you to create consistent batches of paint, making it easier to reproduce colors and maintain a uniform painting style across your artwork. It’s also a good idea to keep a record of your pigment and oil ratios for future reference.
A palette knife is another essential tool when working with oil paints. Use it to mix your paint on a palette, ensuring a thorough blend of pigment and oil. The palette knife can also help you transfer paint from your mixing surface to your canvas, and can be used to create various painting techniques.
While working with your own oil paint, remember to clean your tools thoroughly after each use. This will prolong their lifespan and ensure the quality of your paint remains intact. Use a solvent like turpentine to remove the paint from your tools and follow up with a mild soap and water wash.
Storage is an important aspect to consider when making your own oil paint. To prevent the paint from drying out, store it in airtight containers and keep them away from direct sunlight or extreme temperatures. By following these tips, you’ll be well on your way to successfully creating and working with your own oil paint.
Understanding Additives and Thinners
Additives and thinners are essential components in the process of making oil paint. They provide customization of the paint’s properties, enabling artists to achieve their desired effects and maintain the integrity of the artwork.
Additives are substances that are mixed into the paint to alter its characteristics. They can enhance the flow, adjust the viscosity, or modify the drying time. Some common additives for oil paint include:
- Drying accelerators: These speed up the drying rate of the paint, making it ideal for artists who need quicker results. Examples are cobalt and lead driers.
- Retarders: These additives slow down the drying process, allowing artists more time to work on their piece. Examples include oils like linseed, safflower, and poppy seed oil.
- Stabilizers: These substances help maintain the stability of the paint when mixed with other additives or even the pigments themselves. Examples include aluminum stearate and beeswax.
Thinners, on the other hand, are used to dilute the paint, making it more fluid and easier to manipulate. Thinning the paint can also make it more transparent, which is useful for achieving glazing effects. Some commonly used thinners for oil paints are:
- Solvents: These are liquids that dissolve paint components, such as turpentine and mineral spirits. They are commonly used to clean brushes as well.
- Oils: As mentioned earlier, oils can also be used as thinners. Linseed oil is a popular choice, but other options like safflower or walnut oil can also be used depending on the effect desired.
When choosing additives and thinners for your oil paint, compatibility is critical. Ensure that the substances you select are suitable for the type of paint you are using and don’t negatively impact the desired results. Experimenting with different combinations is an excellent way to find the perfect balance, so don’t be afraid to explore and learn from the process. Always remember to employ proper safety measures when handling any chemicals or solvents and follow the manufacturer’s recommendations for use.
Frequently Asked Questions
What are the main ingredients for making oil paint?
The main ingredients for making oil paint are pigments and a drying oil, such as linseed oil or walnut oil. The pigments are usually natural or synthetic coloring materials that are grounded into a fine powder. The drying oil acts as a binder, holding the pigment particles together and forming a film that can be applied to a surface.
Which pigments should I use for creating different colors?
Various pigments can be used to create different colors when making oil paint. Some common pigments include:
- Titanium white (PW6) for white
- Ivory black (PBk9) for black
- Cadmium colors (such as Cadmium yellow PY35 or Cadmium red PR108) for vivid and opaque shades
- Quinacridone colors (such as Quinacridone magenta or Quinacridone gold) for transparent and intense hues
When selecting pigments, it’s essential to consider factors like lightfastness, tinting strength, and opacity to achieve the desired color and effect.
What is the process of mixing pigments with oil?
To mix pigments with oil, follow these steps:
- Place a small amount of pigment on a clean, non-absorbent surface, such as a glass or marble palette.
- Make a well in the center of the pigment and pour a small quantity of oil into it.
- Use a palette knife to gradually mix the oil and pigment together, carefully incorporating the oil into the pigment until it achieves a smooth, even consistency.
- Continue adding more oil as needed until you reach the desired consistency for your paint.
Are there any recommended safety precautions when making oil paint?
Yes, it’s essential to take safety precautions when making oil paint. Some pigments can be hazardous, so always wear gloves and a mask to protect your hands and lungs from exposure. Work in a well-ventilated area to minimize inhalation of pigment dust. Additionally, avoid consuming food or drinks in your workspace to prevent accidental ingestion of potentially harmful substances.
What are some effective methods to store homemade oil paint?
To store homemade oil paint, transfer the mixture to a clean, airtight container such as a small glass jar or metal paint tube. Label the container with the pigment name and the date it was mixed. Store the containers in a cool, dark place to prolong the paint’s shelf life and prevent it from drying out, oxidizing, or going rancid.
How can I create a non-toxic alternative to traditional oil paint?
To create a non-toxic alternative to traditional oil paint, consider using non-toxic pigments and a binder made from natural oils or plant-based resins. Some non-toxic pigments include earth colors (such as raw umber and burnt sienna) and synthetic organic colors made from azo and phthalocyanine compounds. For a non-toxic binder, you can try using sunflower, safflower, or soybean oil to replace traditional drying oils. Additionally, you can explore using eco-friendly solvents and mediums like citrus-based thinners instead of petroleum-derived ones.