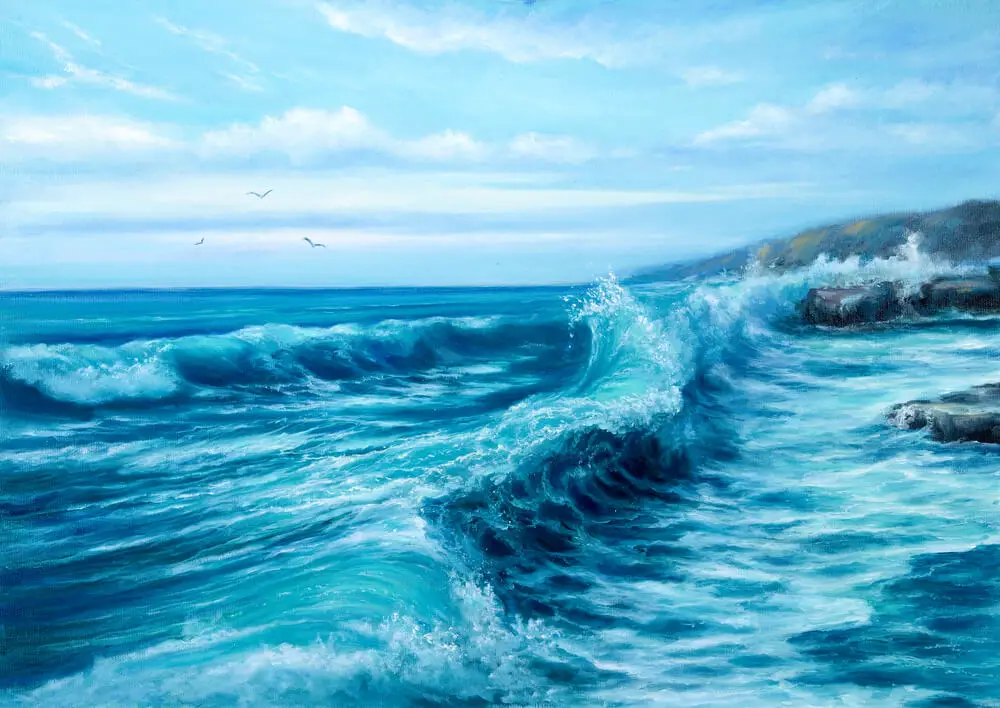
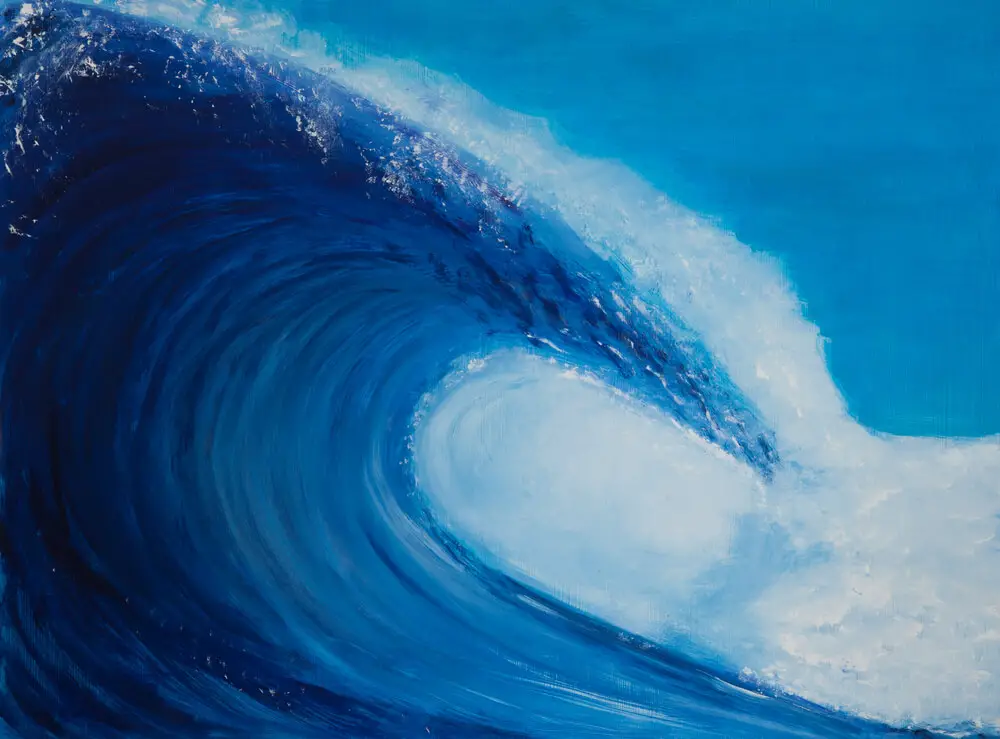
Capturing the beauty and power of a tropical ocean wave in a painting can be an exhilarating experience for artists. Oil paints, with their versatility and rich color tones, are an excellent choice for bringing these natural wonders to life. In this article, we will explore the essential techniques and tips for painting a tropical ocean wave with oil paints that will add depth and realism to your masterpiece.
Getting started with your ocean wave painting requires careful planning and preparation. Familiarize yourself with the structure and movement of waves, paying close attention to the patterns of light and shadows, as well as the way water reflects and refracts colors. You may find it helpful to gather reference images or make quick sketches to serve as a guide and inspiration throughout the painting process.
Once you have a clear understanding of the subject, it’s time to set up your workspace and gather your materials. You’ll want to have a variety of high-quality oil paints, brushes, and mediums on hand, as well as a sturdy canvas or panel to support your painting. Equipped with these essentials and the guidance provided in this article, you’ll be well on your way to creating a stunning depiction of a tropical ocean wave that will amaze your audience.
Materials and Setup
When it comes to painting a tropical ocean wave with oil paints, it’s essential to gather the proper materials before you begin. Having the right tools will help you achieve the desired effect and make your painting process more enjoyable.
Oil Paints: Choose a selection of oil paints suitable for creating the various hues and tones found in tropical ocean waves. Some necessary colors include blues, greens, and whites for the water, along with browns and yellows for the sand or any other elements you’d like to include.
Brushes: A variety of brushes in different sizes and shapes is crucial for achieving the desired texture and blending in your painting. Round, flat, and filbert brushes are useful for various techniques when painting waves and the surrounding ocean scene.
Canvas: Select a canvas or a board of an appropriate size for your painting. The type of canvas can affect the texture and appearance of your artwork, so choose one that complements your style and the desired outcome of your ocean wave painting.
Palette Knife: A palette knife is beneficial for mixing your oil paints and applying them to your painting surface in a more textured manner. This tool can also be used to create effects like foam and splashes on the surface of the ocean wave.
Along with these main materials, you will need a few additional tools and supplies:
- A palette for mixing your oil paints
- Thinner or solvent for cleaning your brushes and thinning the paint if necessary
- Paper towels or rags for wiping off excess paint and cleaning brushes
- An easel or surface to hold your canvas steady while painting
Once you have gathered all the necessary materials and set up your working area, you are ready to begin painting your tropical ocean wave with oil paints. As you paint, remember to be confident, knowledgeable, and clear in your approach, following each step and technique to create a visually stunning representation of your ocean wave.
Choosing Your Color Palette
When painting a tropical ocean wave with oil paints, selecting the right color palette is crucial. To achieve a realistic and vibrant result, consider incorporating the following colors:
- Titanium White: This is an essential color for your palette as it helps to lighten and mix other colors. You will need a generous amount of white to create the various shades of the water.
- Yellow: A small amount of yellow can be used to create a warm hue, representing sunlight reflecting on the water’s surface.
- Ultramarine Blue: This versatile blue is perfect for capturing the deep ocean water and offers a good contrasting color for the wave’s shadows.
- Phthalo Blue: A vibrant, dark blue that is ideal for the main body of the wave, as it brings the intensity and depth of the ocean to life.
- Hue: Hues can vary based on personal preference, but a good choice is Viridian or Indigo. These hues can add a touch of green or purple to the ocean blues, giving your painting a unique look.
- Burnt Sienna: A warm, reddish-brown, Burnt Sienna is excellent for adding depth and shading to the water and the sandy ocean floor.
- Cadmium Orange: Combine small amounts of Cadmium Orange with white to create the warm glow of the sun hitting the wave’s crest.
- Alizarin Crimson: This deep red can be sparingly used to create a subtle warm reflection in the water or to darken the shadows.
- Black: A small amount of black can help create contrast and enhance depth within the painting.
Remember that it’s essential to remain confident and knowledgeable about your color choices while maintaining a neutral and clear approach. Experiment with different ratios and combinations of these suggested colors to achieve the desired effect for your tropical ocean wave painting. Happy painting!
Creating Your Sketch and Composition
To begin painting a tropical ocean wave with oil paints, start by sketching your composition. A good composition captures the essence of ocean waves and their dynamics, while maintaining a balanced and visually appealing structure.
First, find a reference photo of a tropical ocean wave. This image will serve as a guide for your sketch and final painting. When selecting your reference, look for a breaking wave with interesting shapes and movement, as well as clear details of the wave’s crest and surrounding water.
Next, lightly sketch the horizon line on your canvas to help ground the scene. The horizon line can be either straight or slightly curved, depending on your stylistic preference. Placement of the horizon line is important; it can be higher or lower in the composition, impacting the overall mood and depth of the painting.
With the horizon line in place, focus on sketching the breaking wave. Consider the following aspects when drawing the wave:
- Wave shape: The curvature and flow of the wave should convey a sense of motion and power.
- Foam patterns: The foam created by the wave’s breaking action adds texture and visual interest. Sketch in patterns formed by the foam and trails left behind by the wave.
- Shadows and highlights: The light source in your composition will dictate the placement of shadows and highlights within the wave. Include these elements in your sketch to convey depth and realism.
In addition to the main breaking wave, you may want to include smaller waves and ripples in your composition. These elements add to the overall sense of motion and dynamism in the scene.
Once you’re satisfied with your sketch, take a step back and evaluate the composition. Make any necessary adjustments to achieve a balanced and cohesive scene. With your sketch and composition complete, you’re ready to bring your tropical ocean wave to life with oil paints.
Understanding and Painting Values
When painting a tropical ocean wave with oil paints, understanding values is crucial in creating a realistic and visually captivating piece. Values refer to the range of tones, from light to dark, that an artist uses to represent an object’s volume and depth.
The key to mastering values lies in observing and accurately reproducing the contrast between highlights, shadows, and darks. Start by studying your reference image or scene and determining the lightest and darkest points. This will help you understand the full range of values to work with.
Highlights represent the lightest tones in your painting. In an ocean scene, this typically occurs where sunlight directly hits the water’s surface. To create highlights, use small amounts of white or a very light version of your base color, and apply it sparingly to give the illusion of sparkling water. Be mindful not to overdo it, as too much white can look unnatural.
Shadows occur where light is blocked or less intense, creating a gradient of tones. In a tropical ocean wave, shadows may be present under the crest of the wave and on its backside, where sunlight doesn’t directly reach. Subdue the colors in these areas to represent a decrease in brightness.
Darks represent the deepest values, where the least amount of light is present. Often, these areas are found in the deepest parts of the water or in the crevices between waves. Use darker shades of your base color to emphasize the depth and create a strong contrast between light and dark areas. It’s important to be aware of the balance between darks and highlights to achieve a dynamic and realistic painting.
When painting tropical ocean waves, pay attention to the following aspects of values:
- Value range: Ensure there is a wide range of tones, including light, middle, and dark values.
- Contrast: Create a strong difference between light and dark areas to emphasize depth and volume.
- Blending: Gradually blend the colors to represent a smooth transition between the light and dark areas.
By focusing on values, contrast, highlights, shadows, and darks, you will be able to create a realistic and striking rendition of a tropical ocean wave using oil paints. Your understanding of values will greatly influence the final outcome of your painting and help you capture the beauty of the ocean’s limitless energy.
Adjusting and Painting Colors for a Tropical Ocean Wave
To achieve a perfect representation of a tropical ocean wave in your oil painting, selecting and adjusting the right color palette is essential. In this section, we will discuss some key colors to use and how to apply them to your painting surface.
Begin by setting a base color. A tropical ocean wave often has shades of turquoise and aquamarine, so mix a suitable blue-green color for your desired look. You can mix a base color using thalo blue and green, adding a little cadmium yellow to achieve the desired turquoise.
Next, you want to introduce gradient within the wave. Create depth and an illusion of movement by using a combination of lighter and darker shades of your base color. Lighten with white to achieve various shades of the original turquoise, while mixing in ultramarine blue for the darker areas. Remember that the colors will become significantly darker when they dry, so make sure your shades look right when wet.
Now it’s time to apply the colors on your painting surface. Start painting the background layers of the ocean with the darker shades, gradually moving to the lighter hues as you approach the crest of the wave. This will help create the sense of depth and volume within the wave.
To add texture and more realistic ripples in the water, use a dry brush technique to gently blend the edges of each shade transition. This will prevent the colors from looking too flat or stark. For the splash and foam, use a mixture of white and the lightest turquoise to create an illusion of bubbles and water spray around the crest and the breaking part of the wave.
Don’t forget to include reflections, as they contribute to the overall appearance of a tropical ocean wave. Use the colors of the nearby surroundings, like the sky, clouds, or distant land, and delicately incorporate them into the water. This can be done by subtle brush strokes and blending, adding an extra vividness to the painting.
Using the right color combinations and proper painting techniques, your tropical ocean wave will come to life vividly on the canvas with a realistic touch. Stay confident, knowledgeable, and clear in your approach, and you will create a stunning masterpiece.
Blending Techniques and Brush Work
Blending is an essential technique for creating a tropical ocean wave in oil painting. To achieve the desired effect, you need to practice and have a good understanding of brush work. This section will guide you through some crucial blending techniques and brush work.
To start, use a blending brush with soft, curved bristles for smoothly merging adjacent areas. The blending process should be done while the paint is still wet. It’s essential to clean your blending brush frequently, ensuring that the colors do not mix unintentionally.
When painting a tropical ocean wave, pay attention to the direction of your brush strokes. This can enhance the sense of movement and give your wave a realistic feel. For example, horizontal brush strokes can create the effect of a calm ocean surface, while diagonal strokes can convey the energy of a crashing wave.
To create a realistic wave, focus on capturing the balance between the highlights and shadows. First, determine the direction of the light source. This will help you create a sense of depth in your painting and make it appear three-dimensional. Use a dry brush technique to blend the highlights and shadows. Load your brush with a small amount of paint and remove any excess before applying it to the canvas.
For the foam and spray of the ocean wave, you can use a stippling technique. Load your brush with white or a lighter color and dab it onto the canvas, creating small dots of varying sizes. This method gives the appearance of frothy water and adds texture to your painting. Remember to keep the brush strokes in the direction of the wave to maintain consistency.
In summary, blending techniques and brush work play a vital role in capturing a tropical ocean wave in oil painting. Use a soft blending brush to merge colors seamlessly, focus on brush stroke direction for movement, and utilize dry brush and stippling techniques for depth and texture. With practice and patience, you’ll create a stunning ocean wave painting that captures the essence of a tropical paradise.
Capturing Movement and Texture
To create a captivating tropical ocean wave painting, it’s essential to capture the movement and texture of the water. Begin by observing real-life ocean waves or studying photographs for inspiration, taking note of wave formations and patterns.
One effective technique for capturing movement is using a variety of brush strokes to simulate the direction and flow of the wave. To recreate the foamy, frothy surface of the wave, use short, circular strokes with a dry brush. For smoother, calmer ocean surfaces, employ longer, fluid strokes with more saturated paint.
The texture and color of the water play a pivotal role in bringing your painting to life. The surface of the water often reflects the colors of nearby surroundings, including the sky, clouds, and even the sand. Incorporate these colors into your painting to achieve a more realistic and vibrant portrayal of the ocean.
When painting ocean waves, consider the following aspects of texture and movement:
- The base of the wave
- The crest of the wave
- The surrounding water surface
The base of the wave is typically darker and more turbulent, so using a combination of deeper shades of blue, green, and gray will give the appearance of depth and shadow. Add even darker shades beneath the wave to suggest the water’s depth and strength.
The crest of the wave is where the ocean’s energy is released, creating a more dynamic appearance. Use lighter shades of blue, green, and white to create a sense of movement and water spraying into the air. Employ a fan brush to create mist and foam at the wave’s peak.
The surrounding water surface should reflect the overall conditions of the ocean. Calm waters will require smoother brush strokes and a more consistent color scheme, while choppy waters will require more erratic and varied brush strokes to create the texture of rougher waves.
In summary, capturing movement and texture in your tropical ocean wave painting is key to achieving a realistic and captivating result. Pay close attention to wave patterns, utilize varied brush strokes, and incorporate depth of color to create a true-to-life representation of the ocean’s dynamic beauty.
Adding Details and Increasing Realism
Painting a tropical ocean wave with oil paints can bring a whole new dimension to your seascape painting. To add more realism and detail to your painting, follow these steps:
Begin by observing your reference material closely. Whether you are using a photograph or painting from life, take note of the subtle details such as reflections, highlights, and colors present in the scene. This will help in capturing the true essence of a realistic wave.
Work on the wave’s foam patterns. The foam patterns are dynamic and can add a lot of movement to your painting. Use a small detail brush and a mix of white and light blue to carefully create the patterns where the wave breaks and where it meets the shore. Varying the brush strokes and the pressure applied will help in achieving a more natural look.
Pay attention to shadows and reflections in your painting. When painting a wave, consider the water’s transparency and the effect of light as it refracts through the surface. Layer your colors gradually for shadows, using a combination of blues, greens, and blacks. Create reflections by incorporating lighter shades of the sky and surrounding elements onto the water’s surface.
To enhance the realism of your seascape painting, take the time to focus on the surrounding elements, such as the sky and the beach. For the sky, blend your blues and whites carefully to create a sense of depth and atmosphere. To depict the shoreline, use a small brush to create texture with grains of sand and rocks. This will further anchor your wave composition and make it appear more genuine.
By following these tips, you will be well on your way to painting a beautiful and realistic tropical ocean wave with oil paints. Remember to be patient and practice regularly, as mastering the art of capturing waves in motion is a rewarding and impressive skill to have in your artistic repertoire.
Painting Rocks, Sand, and Foreground Elements
Painting rocks, sand, and foreground elements in a tropical ocean wave scene is an essential part of creating a realistic and beautiful artwork. To achieve this, you’ll need to consider the following steps:
Before you begin the actual painting process, it’s important to observe the placement, size, and details of rocks, sand, and other foreground elements. Use reference photos or real-life observations to guide you in making these decisions.
To paint rocks with confidence, first, choose your base color and apply it to the area where the rocks will be. This can be a darker shade of gray or brown, for instance. After that, mix a lighter tone of the same color and add highlights to capture the texture and shape of the rocks. You can also use a palette knife to create more defined edges and lines within the rock formations.
For sand, the key is to create a sense of depth and dimension. Start by painting a base layer, using a lighter color to represent the sunlit areas and the shadows cast by rocks and other elements. You can then add details with varied shades and colors, such as browns, yellows, and whites, to establish texture and differentiation between wet and dry sand. Don’t worry about making sand look uniformly perfect, as natural beaches contain a variety of colors and textures.
When painting foreground elements, like seashells, sea creatures, or vegetation, be sure to consider their size and placement in relation to the rest of the composition. Look at reference photos to ensure accuracy. Paint these elements after the rocks and sand have dried, so you won’t interfere with the existing layers. Add as much or as little detail as you like to create interest in the scene.
Remember to be patient and allow each element to dry before moving on to the next one. This ensures crisp, clean lines and a professional-looking finished piece. With practice, you will gain confidence and knowledge in painting tropical ocean waves, rocks, sand, and foreground elements using oil paints.
Practice, Patience, and Support
When it comes to painting a tropical ocean wave with oil paints, the key to success lies in practice, patience, and support. To achieve the desired results, it’s crucial to take the time to perfect your technique and work with the right tools.
One important tool to consider is the palette knife. Using a palette knife allows for a more textured and realistic representation of the wave’s movement. It’s essential to practice with this tool in order to master its use in creating the foam on the wave’s crest and capturing the intricate details. As you become more comfortable with the palette knife, you’ll notice the significant impact it has on the overall appearance of your wave.
Patience also plays a vital role in perfecting a tropical ocean wave painting. It’s crucial to allow sufficient time for the underpainting to dry before applying multiple layers to create depth and form. A well-executed underpainting serves as a strong foundation for your painting, providing you with the necessary values, contrast, and harmony. The multiple layers require time, and rushing through the process could lead to undesirable results.
Getting support from other artists can help you learn new techniques and improve your skills as you embark on painting your tropical ocean wave. Participating in workshops or attending classes can contribute to your artistic growth and development. Engaging in art communities and sharing your work can boost your morale, as you gain valuable insights, tips, and encouragement from fellow artists.
In conclusion, mastering the art of painting a tropical ocean wave with oil paints requires a combination of practice, patience, and support. Working with the right tools and techniques ensures a captivating recreation of the nature, while continuous development and feedback from the art community help an artist become more skilful in their craft.
Intermediate Techniques and Further Learning
As an intermediate oil painter, there are various ways to improve your skills in painting a tropical ocean wave. One key aspect is mastering the different techniques available for oil painting.
Liquin: This medium helps to speed up the drying process, enabling you to work on your painting within a shorter time frame. It also enhances the smoothness of the paint and allows for better blending. Integrating Liquin into your workflow can be beneficial for creating smoother transitions within your wave painting.
Liner Brushes: To add more details and precision, consider using liner brushes specifically designed for oil paint. These brushes allow you to create intricate lines, giving your tropical ocean wave depth and a more realistic appearance.
One-Sitting Technique: While oil painting is generally a slow-drying process, you can also opt for techniques that enable you to complete your work in one sitting. Known as “alla prima,” this approach involves using a limited color palette and looser brushstrokes. It requires quick decision-making and a confident hand but can result in a truly beautiful and unique representation of an ocean wave.
Slow-Drying Approach: On the other hand, embracing the slow-drying nature of oil paint can be advantageous. This method allows you to build up layers of paint, creating a rich texture and depth in your wave. Additionally, taking your time to carefully study the subject matter will lead to better observation and a more accurate portrayal of the ocean wave.
To further enhance your skills as an intermediate oil painter, don’t hesitate to explore various resources and engage with other artists. You may wish to:
- Attend workshops and classes to learn from experienced oil painters.
- Join online forums and social media groups to discuss techniques and share advice with fellow artists.
- Explore instructional books, YouTube tutorials, and other learning materials devoted to painting ocean waves with oil paint.
By continuously seeking new knowledge and refining your skills, you will soon master the art of painting a tropical ocean wave with oil paints.
Conclusion
In conclusion, painting a tropical ocean wave with oil paints can be an enjoyable and rewarding experience. By following a few simple steps, you can create a stunning piece of art that captures the movement and beauty of nature. Remember to choose the right colors and blend them carefully to create a realistic and vibrant scene.
Take your time in building up layers of paint, paying close attention to the direction of the strokes and the interplay of light and shadow. Keep in mind that practice makes perfect, and don’t be afraid to experiment with different techniques to find your own unique style.
We hope this guide has provided you with the knowledge and confidence you need to create your own beautiful ocean wave painting. Good luck and happy painting!
Frequently Asked Questions
What are the essential colors for painting a tropical ocean wave?
When painting a tropical ocean wave using oil paints, use a basic selection of colors such as Titanium White, Cobalt Blue, Ultramarine Blue, Cadmium Yellow, Alizarin Crimson, Burnt Sienna, and Viridian Green. These colors can be mixed to create a variety of shades and tones, capturing the vibrancy and depth of tropical waters.
What brushes and techniques are needed to create realistic wave effects?
For optimal results, use a combination of different brush types, like flat, round, and fan brushes. Techniques such as dry-brushing, wet-on-wet, and glazing can help you achieve realistic wave effects. Dry-brushing can create the foamy parts of the wave, while wet-on-wet blending is great for smooth transitions of color. Glazing can help add depth to the water.
How can I achieve depth and perspective in my ocean painting?
To create depth and perspective in your seascape, pay attention to the use of color, value, and scale. Objects in the distance typically appear lighter, bluer, and smaller than those in the foreground. Use these principles in your painting, gradually darkening and warming the colors and increasing the size of the waves as they get closer to the viewer.
What is the process for painting the sky and clouds in a seascape?
Start by painting the sky with a gradient, lighter near the horizon and darker towards the top. Use a mix of blues and white for the sky, and a combination of white and grays for clouds. Build cloud shapes using soft brushstrokes and varying the pressure and transparency to create a realistic, fluffy appearance. Remember that cloud shapes change depending on the weather and time of day.
How can I create the appearance of water reflections and transparency?
To paint water reflections and transparency, observe the way light interacts with the water’s surface and use lighter colors to indicate light reflecting off the waves. Use more transparent layers of paint to create the illusion of depth and translucency. Layering and glazing techniques can help in achieving realistic reflections and transparency.
What are some tips for blending and layering colors in an ocean painting?
When blending and layering colors, be mindful of the drying times of oil paints. Start with thin layers and gradually build up to thicker layers as you progress. Use a glazing medium to help with thin washes, and don’t rush the process. Allow each layer to dry before applying the next. Work in sections, blending colors while they are still wet for smooth transitions.