Oil painting is a traditional and revered art form, known for its captivating textures and rich colors. However, artists often gravitate towards canvas as their desired surface, leaving many to overlook the potential of paper and cardstock. These lesser-known alternatives can provide unique qualities to the final artwork, as well as offer a more economical option for creators.
To successfully paint with oils on paper or cardstock, it’s essential to prime the surface first. Priming protects the paper from oil paint’s corrosive nature, prevents the paint from soaking into the fibers, and creates a suitable base for the paint to adhere. In the following sections, you’ll learn about the importance of priming, the various priming materials available, and how to prepare your paper and cardstock for oil painting.
With the proper knowledge and preparation, you can confidently explore the use of paper and cardstock as viable and valuable surface for your oil paintings. Transform your art by embracing this technique, and discover the distinctive effects that these unconventional surfaces can bring to your work.
Choosing the Right Paper and Cardstock
When it comes to oil painting, selecting the proper paper and cardstock is crucial for achieving optimal results. Luckily, there is a wide variety of papers available, each with specific qualities that make them well-suited for different techniques and styles.
Acid-free paper is a must when working with oil paints, as it will ensure the longevity of your artwork. Papers with high acidity can cause the colors to fade and the overall piece to deteriorate over time.
Watercolor paper can also be an excellent choice for oil painting, due to its absorbency and ability to withstand multiple layers of paint. However, it’s crucial to choose one with a weight of at least 300gsm, as thinner papers may warp or buckle under the oil paint.
Printmaking paper is another viable option, often made from 100% cotton or other high-quality materials, providing a strong surface for oil painting. These papers may have a more textured surface, which can add visual interest and depth to your artwork.
For those looking for a smoother surface, oil painting paper offers a suitable alternative to traditional canvas. This type of paper is specifically designed for use with oil paints and typically features a medium-grain surface, providing an ideal balance between texture and workability.
Cardstock can also serve as a potential support for oil paintings, particularly when you want a lightweight, portable surface. However, it is essential to choose a cardstock with a weight of at least 200gsm, to ensure that it can withstand the paint without warping or degrading over time.
Remember that the choice of paper or cardstock can greatly impact your final artwork, so don’t be afraid to experiment to find the material that best suits your style and needs.
Benefits of Using Paper and Cardstock for Oil Painting
Using paper and cardstock for oil painting provides several advantages that make it an appealing choice for artists. One of the primary benefits is its budget-friendly nature. Compared to traditional canvas or wood panels, paper and cardstock are much more cost-effective options for artists. This makes them ideal for creating studies and sketches to test out ideas, techniques, and compositions before committing to a more expensive surface.
Artists often find that working on paper and cardstock enables greater freedom to experiment with composition and colors. As these materials are more affordable than other surfaces, it’s easier to take risks and explore new concepts without worrying about financial constraints. Moreover, the smooth surface of paper and cardstock lends itself to capturing fine details and crisp edges, enhancing the overall quality of the piece.
Another advantage of using paper and cardstock is the ease of framing finished pieces. Artists can quickly and easily place their artwork in a frame without dealing with traditional stretching or mounting methods required for canvas. Furthermore, lightweight materials like paper and cardstock make displaying and transporting artwork more convenient compared to their heavier counterparts.
In summary, paper and cardstock offer numerous benefits for oil painting, including cost-effectiveness, versatility, and ease of framing. Embracing these alternative surfaces allows artists to expand their creative horizons, confidently experiment with new techniques, and produce high-quality finished pieces in a more budget-friendly way.
Materials and Tools for Priming
To prime paper and cardstock for oil painting, you will need a few essential materials and tools.
Firstly, you’ll need a primer. There are a few common options for priming:
- Gesso: A white paint mixture consisting of chalk or limestone, glue, and white pigment. It creates a ground that is absorbent and grips paint well.
- Acrylic Gesso: Essentially a mixture of acrylic paint with chalk or limestone, it is more flexible than traditional gesso and dries faster.
- Oil Primer: Specifically designed for oil-based paints, these primers provide the ideal surface to start painting. They create a less absorbent ground compared to other primers and, thus, result in vibrant colors.
In addition to primer, using an acrylic paint mid-tone on the cardstock can provide a good base for oil paint application.
Next, you’ll need different types of brushes to apply the primer and paint:
- Flat brush: A broad flat brush helps in evenly spreading large areas of primer or paint.
- Bristle brush: These brushes are effective for creating texture on the painting surface.
To prepare the paper or cardstock, you’ll need masking tape to secure the material on a flat surface, preventing warping due to moisture from the primer. Furthermore, a sealant can be applied to the backside of the paper or cardstock. This step helps to protect it from moisture and extend its longevity.
Remember to follow the manufacturer’s instructions for your chosen primer, as some may require specific application techniques or additional materials. With these essential materials and tools, you’ll be well-equipped to prime your paper and cardstock for oil painting.
Understanding Sizing and Priming
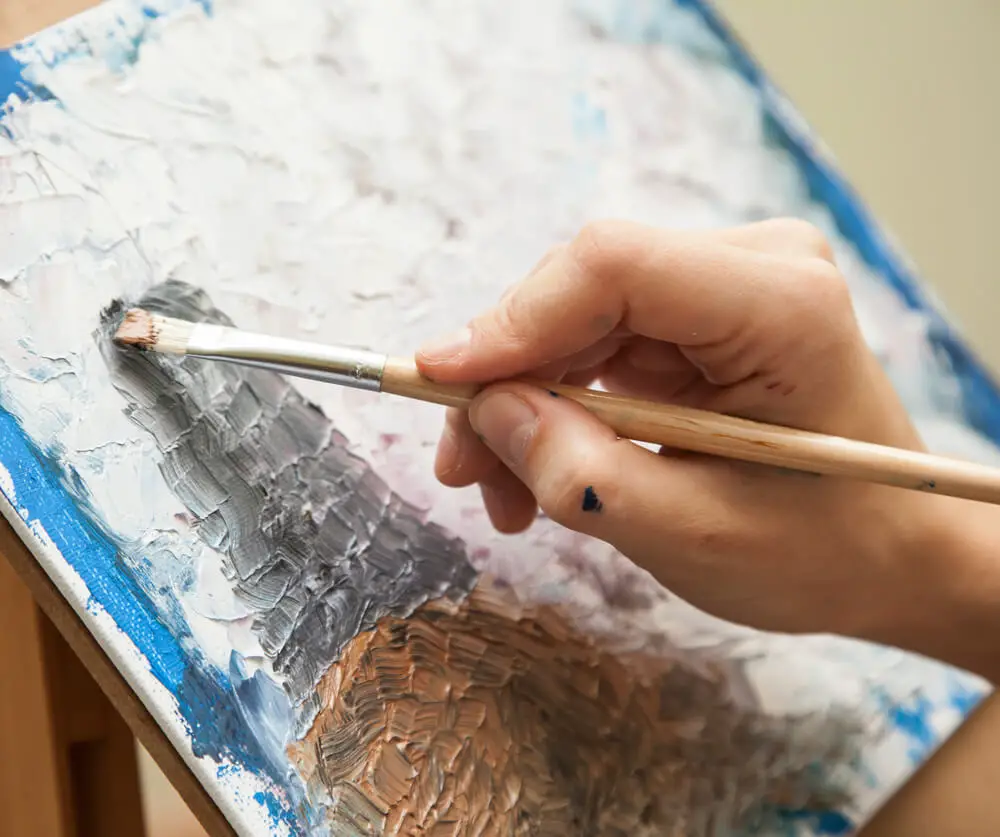
When preparing paper or cardstock for oil painting, it is essential to use both sizing and priming techniques. Sizing is the process of sealing the paper to create a barrier between the absorbent surface and the oil paint. This prevents the paint from soaking into the paper, which can cause deterioration or discoloration over time.
There are various materials available for sizing, including rabbit skin glue or synthetic alternatives such as Acrylic Gesso and PVA (Polyvinyl Acetate). Selecting the appropriate sizing agent is crucial, as it will impact the paper or cardstock’s absorbency while providing a stable surface for oil paint application.
Priming is applying an initial layer of paint over the sized surface, creating a non-absorbent surface for the subsequent layers of paints. This layer serves a dual purpose: it prevents the oil paint from soaking into the paper fibers, and it enhances the paint’s adhesion to the surface. Acrylic Gesso is a popular priming option due to its flexibility and compatibility with oil paints.
To optimize the painting surface and ensure proper adhesion, follow these steps:
- Sizing: Apply a thin, even layer of sizing onto clean, dry paper or cardstock. This can be done using a brush, roller, or even a sponge. Allow the sizing to dry completely before moving on to the next step.
- Priming: Evenly apply a layer of primer, such as Acrylic Gesso, over the sized surface. Allow the primer to dry fully as per the manufacturer’s instructions. Depending on the paper or cardstock’s texture and desired absorbency, multiple primer layers may be required.
It is essential to note that priming and sizing may slightly alter the paper or cardstock’s texture and appearance. Therefore, it is advised to test these processes on a small section or a sample piece of the same material before committing to the entire sheet.
In summary, sizing and priming provide the necessary preparation that allows for a successful oil painting on paper or cardstock. These essential steps create a barrier between the absorbent surface and the oil paints, ensuring the artwork’s longevity and stability while enhancing adhesion.
How to Prime with Acrylic Gesso
Priming your paper or cardstock with acrylic gesso is a crucial step in preparing your surface for oil painting. Acrylic gesso primer creates a protective barrier, preventing oil paints from seeping through your canvas or paper and causing long-term damage. This primer also provides a slightly textured surface, perfect for enhancing your brushstrokes and overall appearance of your oil painting.
To begin priming, first ensure you have the necessary materials:
- Acrylic gesso (white or tinted)
- A flat brush or sponge brush
- Your canvas or paper surface
- A clean, flat work area
- Lay your canvas or paper on a clean, flat work area. Make sure your surface is dust-free to ensure the gesso adheres properly.
- Open your container of acrylic gesso. If it’s your first time using a particular gesso, test a small amount on a scrap piece of material to determine the appropriate consistency. You may need to add a small amount of water to thin the gesso for even application.
- Apply the gesso to your surface using a flat brush or sponge brush. Make long, even strokes. Don’t worry if the white gesso seems visible; it will dry clear or with a slight tint depending on your chosen gesso color.
- Allow the first coat of gesso to dry completely before applying a second coat. This may take a few hours, depending on the thickness of the gesso and humidity in your work environment.
- Once the first coat is dry, apply a second coat of gesso in the opposite direction (e.g., if you brushed horizontally the first time, brush vertically the second time). This creates a more textured surface on which to paint.
- Let the second coat dry completely before using your canvas or paper for oil painting. If needed, you can lightly sand the surface after it’s fully dry to create a smoother texture.
By following these steps, you will have successfully primed your paper or cardstock with acrylic gesso, creating a protected and textured surface for your oil painting endeavors.

How to Prime with Oil-Based Primer
Using an oil-based primer is essential for artists who want to create oil paintings on paper or cardstock, as it helps to prevent the oil from being absorbed into the material. Oil absorption can lead to a loss of vibrancy and durability in the finished artwork. Following these steps will assist you in creating a non-absorbent surface.
Before you begin, ensure that your paper or cardstock is of heavy weight and acid-free. This helps to avoid warping or yellowing of the material over time.
1. Prepare your workspace: Choose a well-ventilated area and protect your workspace with a drop cloth or newspapers. Lay your paper or cardstock flat on your workspace.
2. Protect the edges and corners: To avoid curling, you may want to tape your paper or cardstock at the edges to a sturdy surface such as a board. Use low-tack painter’s tape to hold the paper in place while priming.
3. Choose the right oil-based primer: For oil painting, a dedicated oil primer is needed to seal the surface and reduce absorption. Select a high-quality and appropriate oil primer, and ensure that you have a clean, wide brush to apply it evenly.
4. Apply the oil primer: Using your brush, apply the oil primer evenly across the paper or cardstock in thin layers. Follow the manufacturer’s instructions on the primer’s container regarding the number of layers and drying times. It’s important to allow each layer to dry completely before applying the next coat. Generally, two to three layers of primer are sufficient.
5. Allow to dry thoroughly: After applying the final layer of primer, allow the paper or cardstock to dry completely. This might take up to a day, depending on the climate and primer.
Once the oil-based primer has dried, your paper or cardstock is ready to use for oil painting. With this non-absorbent surface, you can create stunning and long-lasting artwork on paper without compromising the vibrancy and performance of your oil paints.
Toning Your Paper or Cardstock
Toning your paper or cardstock is an essential step to prime it for oil painting. It helps to set a base color or atmosphere for your artwork, allowing you to make better decisions about color and value as you paint. The process is quite simple and can be done with a variety of materials.
Start by choosing a color for toning your paper. Red or burnt sienna are popular choices, as they provide a warm base that works well with most subjects. However, feel free to experiment with other colors to fit your specific needs or preferences.
To begin toning, create a diluted mixture of your chosen color. This can be achieved by using watercolor washes or acrylics thinned with water. Aim for a consistency that allows for easy application, but isn’t too watery or opaque. Test your mixture on a small, inconspicuous area of your paper or cardstock to ensure it’s the correct consistency and the desired color.
Now you’re ready to apply the wash to your paper. Use a large, soft brush to evenly distribute the color across the entire surface of your paper. Work quickly and with smooth, confident strokes to avoid streaks or unevenness. Allow the wash to dry completely before moving on to your oil painting.
Remember, it’s essential to use non-absorbent paper or cardstock when working with oil paints to prevent the paint from soaking into the paper fibers. This also prevents your paper from becoming too oily or fragile. Choosing the right surface will ensure a successful outcome for your artwork.
Toning is also an excellent opportunity to create thumbnail sketches on your toned paper. These small, rough drawings will help plan the composition of your painting by allowing you to experiment with different layouts and ideas without committing to a full-size artwork.
In conclusion, toning your paper or cardstock is a crucial step in preparing it for oil painting. By selecting an appropriate color and applying a consistent watercolor or acrylic wash, you can enhance your artwork and create a strong foundation for your painting. Enjoy the process and happy painting!
Mounting and Framing
When working with paper or cardstock for oil painting, the process of mounting and framing is essential for the longevity and presentation of your artwork. Mounting refers to the process of attaching the paper or cardstock to a solid support, while framing involves enclosing the entire piece in a protective, aesthetic frame.
A popular option for mounting paper and cardstock is to attach them to a wood panel. This provides a sturdy support and ensures the stability of your artwork. To mount the paper, use a good quality adhesive that is archival and acid-free, such as PVA or gel medium. Apply it evenly, avoiding any wrinkles or bubbles, and let it dry thoroughly before painting.
Linen can also be used as a mounting surface, offering a smoother and more even texture than wood. It can be stretched over the panel, ensuring that the edges of the paper are well-secured. Make sure to choose a linen with a fine weave to avoid any texture irregularities that could affect your painting.
When it comes to framing, a box frame is highly recommended for paper and cardstock oil paintings. This type of frame surrounds the artwork with a gap between the painting and the glass, providing protection against moisture and other environmental factors. When selecting a box frame, opt for acid-free matting and UV-protective glass to preserve the colors and integrity of your artwork.
In summary, mounting your paper or cardstock oil painting on a solid support, such as a wood panel or linen, and protecting it with a high-quality box frame, will ensure that your artwork remains in good condition for years to come. Remember to use archival materials and choose acid-free, UV-protective elements during the mounting and framing process to maintain the vibrancy and longevity of your oil painting.

Preventing Damage and Cracking
To prevent damage and cracking when working with oil paintings on paper or cardstock, it’s essential to adequately prepare the surface. One common issue, known as “sinking in,” occurs when the oil from the paint penetrates the paper, causing it to weaken and deteriorate.
To avoid this, start by applying a good quality primer, such as acrylic gesso, to the surface of the paper or cardstock. This provides a barrier against the oils and solvents present in the paint, preventing them from seeping through. Apply multiple layers of primer, allowing each coat to dry thoroughly before adding the next. This process will help create a stable and even texture for your painting.
When choosing your painting materials, opt for a thicker paper or cardstock to support the weight of the oil paint. A weight of at least 290 gsm (grams per square meter) is recommended. It’s also worth considering a surface specifically designed for oil painting, such as oil paper or primed canvas paper, as these materials are more resistant to cracking and tearing.
In addition to preparing the surface, working with good quality, artist-grade oil paints and solvents can significantly decrease the risk of damage and cracking. These materials are formulated to have a more reliable pigment distribution and better archival qualities compared to student-grade or inexpensive alternatives.
When applying paint to the primed surface, be mindful of the thickness and texture you create. Applying paint too thickly can lead to cracks forming on the surface. To prevent this, try building up your painting with thin, even glazes, allowing each layer to dry completely before applying the next. This method will help create a stable structure that can resist cracking over time.
Another factor to consider when painting on paper or cardstock is the use of mixed media. While it’s tempting to incorporate watercolors or other media into your oil paintings, doing so can lead to compatibility issues and potential damage. For example, watercolors can cause the surface to become damp, leading to buckling or warping. Stick to oil-based materials as much as possible when working with paper or cardstock for oil painting.

Techniques for Painting on Primed Paper and Cardstock
When working with primed paper or cardstock for oil painting, there are several techniques to consider. Proper preparation and effective techniques will help you achieve the desired results with your artwork.
First, consider pre-toning your surface. This involves painting a layer of acrylic or oil paint over the surface, typically in a neutral or muted color, before beginning your actual artwork. Pre-toning can help establish a consistent tone throughout the painting and even out any imperfections in the surface.
Next, experiment with brush strokes to create different effects. Short, varied brush strokes can add texture and visual interest, while long, smooth strokes can create soft gradients. Combine both types of brush strokes in your oil painting to depict a diverse range of subjects and moods.
Oil painting techniques such as blending and glazing can also be used effectively on primed paper and cardstock. Blending involves smoothing out transitions between colors, while glazing is the application of a thin, transparent layer of paint over existing colors – allowing subtler adjustments and richer effects.
A gradient is a gradual transition between two or more colors. This technique can be useful for creating atmospheric backgrounds or transitions between different elements in your painting. To achieve a smooth gradient, slowly add small amounts of one color to another, blending the paint either directly on the surface with your brush or on a palette before application.
Seascape paintings can also be achieved beautifully on primed paper and cardstock using oil painting techniques. Begin with a base layer of paint to create the general shapes, colors, and movement of the scene. Then, build on this foundation by adding layers of paint with varying thickness and transparency to create depth, texture, and detail to your seascape.
Tooth refers to the surface texture of your paper or cardstock. It is essential to choose a paper with the right amount of tooth, as it affects the way the paint adheres to the surface. For oil painting, a paper with moderate-to-heavy tooth is ideal, allowing the paint to grip effectively while maintaining an even application.
Keep these techniques and considerations in mind while working on primed paper and cardstock for oil painting, and you will create beautiful artwork with confidence and ease.
Finishing Touches
After priming your paper or cardstock, it’s important to apply the finishing touches that will enhance the appearance of your artwork. Choose the desired finish, like a glossy finish, to bring out the colors and textures in your oil painting. Applying the right finish can make a significant difference in the final presentation as well as protect your substrate from external factors.
When cutting your primed paper or cardstock, use a mat knife to achieve clean, precise edges. This will ensure that your substrate fits well within your framing or display, while also helping to create a professional-looking result. Make sure to exercise caution when handling a mat knife, as they are sharp, and always work on a surface that is safe for cutting.
Throughout the painting process, take care to maintain the condition of your artwork by providing a stable and protected work environment. This includes preventing any damage to your substrate, such as bending or tearing. Proper storage is also key, both during and after the completion of your oil painting. Keep your work in a clean, dry, and temperature-controlled environment to preserve its quality.
Using a variety of techniques and tools, you can enhance your artwork with a unique and captivating appearance. Experiment with different brushstrokes, layering methods, and color combinations to discover your own signature style. Don’t be afraid to step outside of your comfort zone and explore new techniques that can transform your art into a truly one-of-a-kind masterpiece.
Remember, the finishing touches are what set your work apart and showcase your skill as an artist. By investing the time and effort into perfecting these details, you’ll create a final product that you can be proud of and that your audience will admire.
Frequently Asked Questions
What is the best paper to use for oil painting?
There are several types of paper suitable for oil painting. Arches Oil Paper, Strathmore 400 Series oil painting paper, and Canson Canva-Paper are a few popular options. These papers are specifically formulated for oil painting and can handle the weight and texture of the medium.
Do I need to apply gesso before using oil paint on paper?
Applying gesso before using oil paint on paper helps to prevent the paint from soaking into the paper fibers, which can cause deterioration over time. Though it’s not mandatory, priming paper with gesso helps to create a smooth and uniform surface for the paint to adhere to.
Can oil paint be used directly on watercolor paper?
Using oil paint on watercolor paper is possible, but it requires proper preparation. Since watercolor paper is more absorbent, it’s essential to apply a layer of gesso or other suitable primers to prevent the oil paint from soaking through the paper fibers and causing damage.
What is the difference between oil painting on paper and canvas?
Paper and canvas offer different textures and properties that affect the final appearance of an oil painting. Canvas is more durable, easily stretched, and less susceptible to buckling or warping. On the other hand, paper is more affordable and portable. However, it’s essential to properly prime and prepare paper for oil painting to prevent the paper fibers from becoming damaged.
How can I prime cardboard for oil painting?
To prime cardboard for oil painting, sand the surface lightly to create tooth, then apply a coat of gesso to seal the surface. Allow the gesso to dry completely before applying additional coats, if desired. It’s crucial to cover all areas, including the edges, to prevent the oil paint from penetrating and damaging the cardboard fibers.
Is priming necessary before applying oil paint on paper?
While it’s technically possible to apply oil paint directly to paper without priming, taking the time to prime the surface is highly recommended. Priming prevents deterioration by preventing the oils from soaking into the paper fibers, and it also provides a smoother surface for painting. Using a dedicated oil painting paper that comes pre-primed is another option.
