Introduction to Oil Painting
Welcome to the exciting world of oil painting! This timeless art form has been used by artists for centuries to create stunning works of art. Whether you’re a beginner or an experienced artist, there’s always something new to learn about oil painting.
- Understanding the Basics of Oil Painting
- Oil Painting for Beginners: Getting Started
- Choose your materials: You’ll need oil paints, brushes, a palette, a palette knife for mixing paints, a canvas, and some rags for cleaning.
- Set up your workspace: Make sure you have a well-ventilated area to work in, as some oil paints can have strong fumes. Lay out your materials in a way that’s comfortable for you.
- Start painting: Begin with simple shapes and colors. Don’t worry about making a masterpiece on your first try. The important thing is to get a feel for the paint and the brushes.
Oil painting is a technique that uses pigments mixed with drying oils, such as linseed, walnut, or poppy, as the medium. The oil acts as a binder, holding the pigment together and allowing it to adhere to the canvas. The beauty of oil painting lies in its rich, vibrant colors and its flexibility. You can create thick, textured strokes, or thin, delicate lines. You can even layer colors on top of each other, creating a depth and complexity that’s hard to achieve with other mediums. Learn more about the basics of oil painting on Wikipedia.
Starting with oil painting might seem daunting, but don’t worry! Here are some simple steps to get you started:
Remember, practice makes perfect. The more you paint, the better you’ll get. So, don’t be discouraged if your first few paintings don’t turn out the way you want. Keep trying, keep learning, and most importantly, have fun!
Advanced Oil Painting Techniques
As you progress in your journey as an oil painter, you will find that there are several advanced techniques that can help you create more realistic and detailed artworks. Let’s delve into some of these methods.
Realistic Oil Painting Methods
Realistic oil painting is about capturing the world as it is, with all its complexity and detail. This requires a deep understanding of the medium and a mastery of certain techniques. Here are two key methods:
- Creating depth and texture in your oil paintings
- Mastering the art of blending in oil painting
Depth and texture are crucial elements in realistic oil painting. They give your artwork a three-dimensional feel, making it come alive. To create depth, you need to understand the concept of perspective. Objects closer to the viewer should be larger and more detailed than those further away. For texture, you can experiment with different brush strokes and layering techniques. For instance, you can apply thick layers of paint (a technique known as impasto) to create a textured, tactile surface.
Blending is another essential skill in realistic oil painting. It allows you to create smooth transitions between colors and tones, which is particularly important when painting skin tones or skies. To blend effectively, you need to work while the paint is still wet, gently smoothing the transition between colors with your brush. Remember, practice makes perfect. The more you blend, the better you’ll get at it.
Mastering these advanced oil painting techniques will take time and patience, but the results will be worth it. Your paintings will have a depth and realism that truly captures the beauty of your subject.
Oil Painting Tips for Advanced Artists
As an advanced artist, you might be looking for ways to refine your oil painting techniques. Here are a couple of tips that could help you take your artwork to the next level.
- Experimenting with Different Brushes and Tools
- Understanding the Importance of Lighting in Oil Painting
One of the most effective ways to enhance your oil painting skills is by experimenting with different brushes and tools. Each brush offers unique stroke patterns and textures, which can significantly influence the outcome of your painting. For instance, a flat brush can be used for bold, sweeping strokes, while a round brush is perfect for detailed work. Don’t limit yourself to traditional brushes; palette knives, sponges, and even your fingers can be used to create interesting effects. Palette knives, in particular, are excellent for creating textured, impasto effects. Remember, the key to mastering any art form is experimentation.
Lighting plays a crucial role in oil painting. It can dramatically alter the mood, depth, and realism of your artwork. Understanding how light interacts with objects and how it influences colors and shadows is essential for advanced artists. For example, in a brightly lit scene, colors appear more vibrant, while in a dimly lit scene, colors are more subdued and shadows become prominent. Try painting the same scene under different lighting conditions to understand its impact. Chiaroscuro, a technique that uses strong contrasts between light and dark, is a great method to study the effects of lighting.
By incorporating these tips into your painting routine, you can continue to grow as an artist and create more complex, engaging works of art. Remember, the journey of an artist is a continuous learning process. Keep experimenting, keep learning, and most importantly, keep painting.
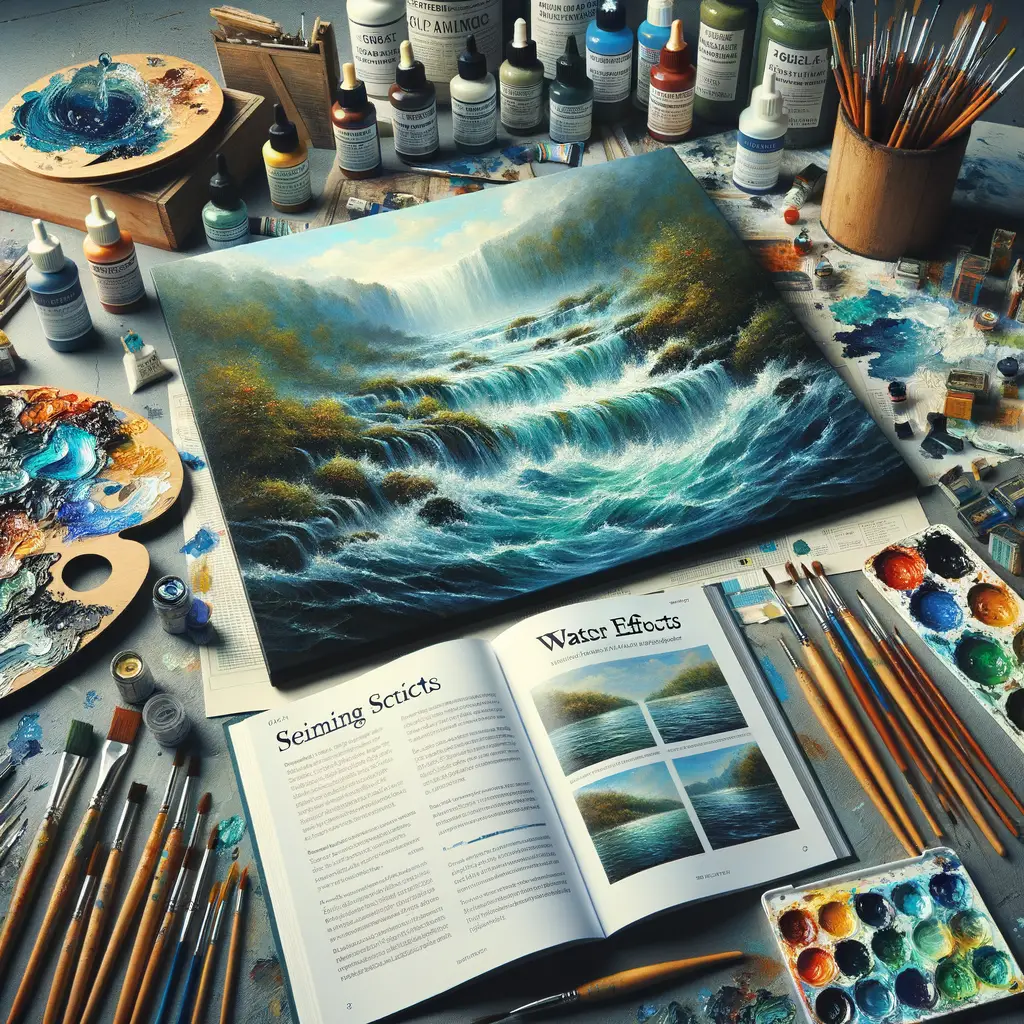
Realistic Water Effects in Oil Painting
Painting water can be a challenging task, especially when using oil paints. However, with the right techniques, you can create realistic and stunning water effects that bring your artwork to life. Let’s explore some basic techniques to help you get started.
Painting Water in Oil: Basic Techniques
Before you start painting, it’s important to understand two key aspects: the behavior of water and how to create the illusion of transparency and reflection. These elements are crucial in achieving a realistic depiction of water in your oil paintings.
- Understanding the Behavior of Water
- Creating the Illusion of Transparency and Reflection
Water is always in motion, and it reflects the colors and shapes of its surroundings. It’s important to observe real water bodies to understand how light and objects interact with it. You can visit a local pond, river, or even use a filled glass of water as a reference. Notice how the water’s surface changes with the wind, how it distorts objects underneath, and how it reflects light and colors. This article on Wikipedia provides more scientific insights into the properties of water.
Water is partially transparent and highly reflective. To depict this in your painting, you’ll need to master the art of creating reflections and showing objects beneath the water’s surface. Start by painting the objects under the water, then add a layer of color for the water’s surface. Use lighter and darker shades of the same color to show the water’s movement. For reflections, mirror the colors and shapes of the surrounding objects on the water’s surface, but remember to distort them slightly to show the water’s movement.
Mastering these basic techniques will set a strong foundation for your water painting skills. As you practice, you’ll find yourself creating more realistic and captivating water effects in your oil paintings.
Oil Painting Water Tutorial: Advanced Techniques
As we delve deeper into the art of painting water with oil paints, we will explore advanced techniques that can help you create more realistic and captivating water scenes. These techniques require a bit more skill and understanding of the medium, but with practice, you can master them and take your oil painting to a new level.
- Creating realistic waves and ripples in oil painting
Waves and ripples can add a dynamic element to your water scenes. To create realistic waves, it’s important to understand how light interacts with water. The crest of a wave is usually lighter in color, while the trough is darker. Use a mix of white and blue for the crest and a darker shade of blue for the trough. For ripples, use a small brush to create thin lines that follow the direction of the water flow. Remember, ripples are not perfectly straight, so add some variation to your lines.
- Mastering the art of painting underwater scenes
Underwater scenes can be a challenge to paint because of the unique lighting conditions. Light refracts, or bends, when it enters water, creating a distorted view of objects. To capture this effect, paint objects in a slightly skewed manner. Also, remember that colors appear less vibrant underwater, so use muted tones. For the surface of the water, use a mix of light blue and white to create the illusion of sunlight filtering through the water.
These advanced techniques can help you create more realistic and engaging water scenes in your oil paintings. Practice is key when it comes to mastering these techniques. So, pick up your brush and start painting!
Remember, the beauty of art lies in its uniqueness. Don’t be afraid to experiment and create your own techniques. As Vincent Van Gogh once said, “I dream of painting and then I paint my dream.”
Creating Water Effects in Painting: Case Studies
One of the most challenging aspects of painting is capturing the essence of water. Let’s delve into some case studies to understand how artists have successfully created water effects in their paintings.
Case Study 1: The Calm Lake
The Calm Lake is a masterpiece that perfectly captures the serene beauty of a tranquil lake. Let’s examine the techniques used and the key takeaways for painting calm water.
- Analyzing the techniques used
- Key takeaways for painting calm water
The artist of The Calm Lake used a combination of techniques to depict the calmness of the water. The first technique is the use of horizontal brush strokes. This creates a sense of stillness and tranquility. The artist also used a limited color palette, mainly blues and greens, to create a sense of depth and calmness. The reflection of the sky and the surrounding landscape on the water surface is another technique used to create the illusion of calm water.
There are several key takeaways from this case study. First, the use of horizontal brush strokes can effectively create a sense of calmness in water scenes. Second, a limited color palette can help to create depth and a sense of tranquility. Lastly, reflections are a powerful tool for creating the illusion of calm water. By carefully observing and replicating the way light reflects off calm water, artists can create a realistic and tranquil water scene.
Case Study 2: The Roaring Ocean
Our second case study explores the dynamic and powerful scenes of the roaring ocean. The ocean, with its ever-changing moods and colors, presents a unique challenge for artists. Let’s delve into the techniques used to capture this turbulent beauty in oil painting.
- Understanding the techniques for painting rough water
- Key takeaways for painting turbulent water scenes
- Observe and study: Spend time observing the ocean in different weather conditions. Notice how the color and shape of the waves change.
- Use varied colors: Don’t limit yourself to just blue and white. Use a variety of colors to add depth and interest to your painting.
- Depict movement: Use sweeping, energetic brush strokes to depict the movement of the waves.
- Practice: Like any skill, painting water takes practice. Don’t be discouraged if your first few attempts don’t turn out as you hoped. Keep practicing and experimenting with different techniques.
Painting rough water requires a different approach than calm water. The key is to capture the movement and energy of the waves. This involves using a variety of brush strokes and colors to depict the churning water.
Start by laying down a base color, usually a darker shade of blue or green. Then, add lighter colors on top to represent the foam and spray of the waves. Use quick, sweeping brush strokes to create the impression of movement.
Remember, the ocean is not a uniform color. Use different shades of blue, green, and even purple to give depth and realism to your painting. Oil paints are perfect for this, as they allow for excellent blending and layering of colors.
Painting the roaring ocean can be a challenging but rewarding experience. Here are some key takeaways to remember:
In conclusion, painting the roaring ocean is a test of observation, understanding of color, and brush control. But with practice and patience, you can create a stunning and dynamic seascape that captures the raw beauty and power of the ocean.
Conclusion: Mastering the Art of Painting Water in Oil
In this journey of learning, we’ve explored the world of oil painting, delved into advanced techniques, and focused on creating realistic water effects. We’ve also examined case studies to understand how these techniques are applied in real-world scenarios. Now, as we conclude, let’s recap what we’ve learned and look forward to what’s next in your journey of mastering oil painting.
- Recap of oil painting techniques for realistic water effects:
- Continuing your journey in mastering oil painting:
We started with the basics of oil painting, understanding the tools and materials needed. We then moved on to advanced techniques, focusing on how to create realistic water effects. We learned about the importance of observation, understanding how light interacts with water, and the use of colors and brush strokes to create the illusion of water. We also discussed the importance of practice and patience in mastering these techniques.
Mastering the art of painting water in oil is a journey, not a destination. It requires continuous learning, practice, and exploration. Keep experimenting with different techniques, observe the world around you, and don’t be afraid to make mistakes. Remember, every great artist was once a beginner. So, keep painting, keep learning, and keep growing.
As Vincent Van Gogh once said, “I dream my painting and I paint my dream.” So, dream big, paint with passion, and master the art of painting water in oil. Happy painting!