Introduction to Oil Painting
Welcome to the fascinating world of oil painting! This art form has been around for centuries, captivating artists and art lovers alike with its rich colors and versatile techniques. Whether you’re a budding artist or a seasoned professional looking to explore a new medium, this guide will help you understand the basics of oil painting and get started on your journey.
- Understanding the Basics of Oil Painting
- Oil Painting for Beginners: Getting Started
Oil painting is a type of slow-drying paint that consists of particles of pigment suspended in a drying oil, typically linseed oil. The viscosity of the paint can be modified by the addition of a solvent such as turpentine or white spirit, and varnish may be added to increase the glossiness of the dried oil paint film. Oil paints have been used in Europe since the 12th century for simple decoration, but were not widely adopted as an artistic medium until the early 15th century. You can learn more about the history of oil painting here.
Starting with oil painting can be a bit daunting, but don’t worry! The first step is to gather your materials. You’ll need oil paints, brushes, a palette, a canvas, and a solvent for cleaning your brushes. Once you have your materials, you can start experimenting with mixing colors and applying paint to the canvas. Remember, practice makes perfect. Don’t be discouraged if your first few paintings don’t turn out as you hoped. Keep trying, keep learning, and most importantly, keep enjoying the process!
As we delve deeper into the world of oil painting, we’ll explore advanced techniques, the art of painting skies, landscape oil painting techniques, and much more. Stay tuned for a journey of creativity and learning!
Advanced Oil Painting Techniques
As you progress in your oil painting journey, you might be interested in exploring advanced techniques. These techniques can help you add more depth and detail to your artwork, making it more appealing and realistic. Let’s dive in and explore some of these advanced oil painting techniques.
- Exploring advanced oil painting techniques
- Glazing: This technique involves applying a thin, transparent layer of oil paint over a dried layer. It can help you achieve a luminous effect in your paintings.
- Impasto: This technique involves applying thick layers of paint to create a textured, three-dimensional effect.
- Scumbling: This technique involves applying a thin, opaque layer of paint over a dried layer. It can help you soften colors and edges in your paintings.
- Techniques for painting skies in oil
- Gradient Technique: This technique involves blending colors to create a smooth transition from one color to another. It’s perfect for painting skies at sunrise or sunset.
- Cloud Technique: This technique involves using a fan brush to create fluffy, realistic clouds.
- Atmospheric Perspective: This technique involves using lighter colors and less detail as you paint farther into the distance. It can help you create a sense of depth and distance in your sky paintings.
Advanced oil painting techniques can help you create more detailed and realistic paintings. These techniques include:
These techniques can add depth and complexity to your paintings, making them more engaging and visually appealing.
Painting skies in oil can be a challenging but rewarding task. Here are some techniques you can use:
By mastering these techniques, you can create breathtaking sky paintings that captivate your audience.
Remember, practice makes perfect. Don’t be afraid to experiment with these techniques and make them your own. Happy painting!
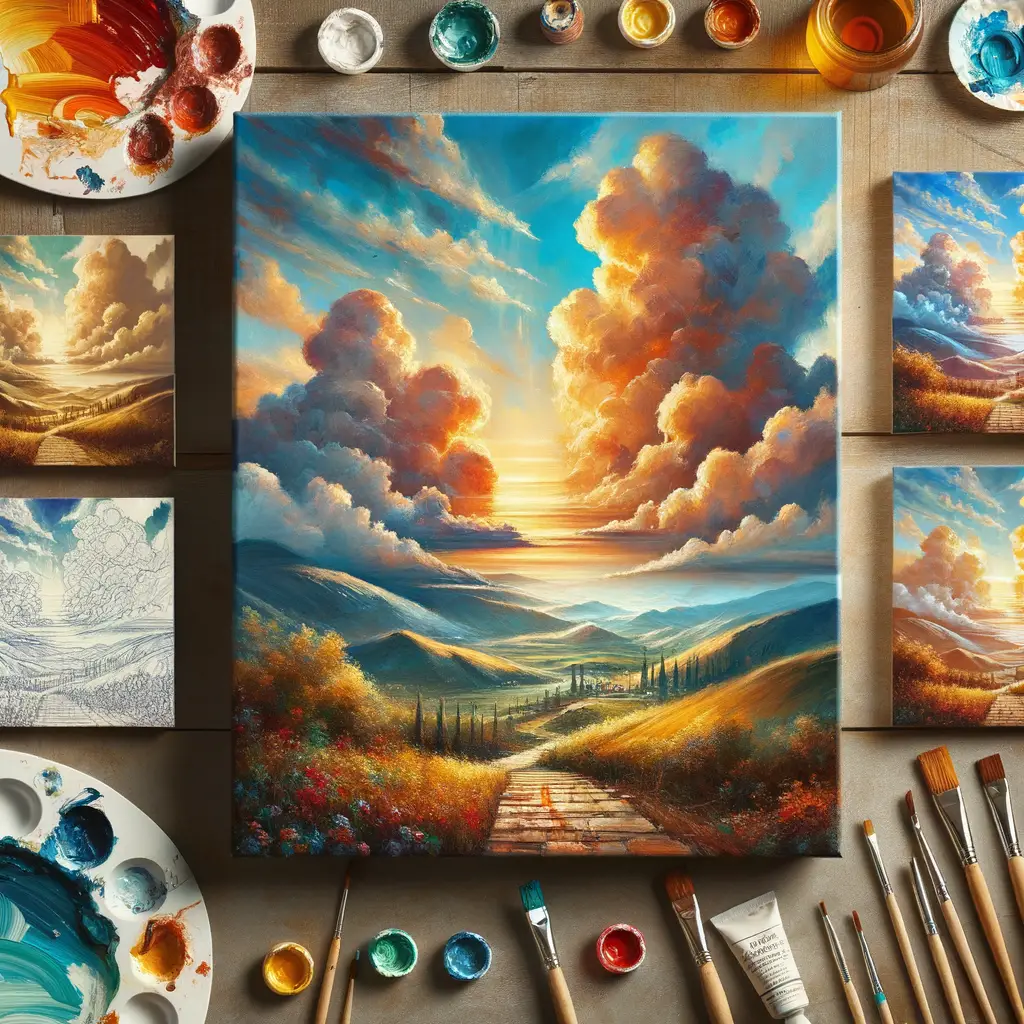
The Art of Painting Skies
Painting skies is a fascinating aspect of oil painting. It requires a deep understanding of colors and how they interact with each other. Let’s delve into the art of painting skies and learn how to mix oil paints to achieve different sky colors and understand the color theory behind sky painting.
Understanding Sky Colors
When it comes to painting skies, understanding colors is crucial. The sky isn’t just blue; it’s a symphony of colors that change with the time of day and weather conditions. Here are some key insights into mixing oil paints for different sky colors and understanding the color theory behind sky painting.
- How to mix oil paints to achieve different sky colors
- Understanding the color theory behind sky painting
The sky’s color can range from the deepest blues to the softest pinks, oranges, and purples. To achieve these colors, you need to understand how to mix oil paints. For example, to create a deep blue sky, you might mix ultramarine blue with a touch of crimson. For a sunset sky, you might mix red, orange, and a hint of purple. Experiment with different combinations to achieve the desired effect.
Color theory is an essential part of painting skies. It’s the study of how colors interact with each other and how they affect the viewer. For example, warm colors like red and orange can make a sky seem warmer and more inviting, while cool colors like blue and purple can create a sense of calm and tranquility. Learn more about color theory here.
Understanding sky colors and how to mix oil paints is a fundamental part of painting skies. With practice and patience, you can create beautiful, realistic skies that add depth and dimension to your paintings.
Creating Depth and Dimension
When it comes to painting skies, creating depth and dimension can make your artwork come alive. Let’s explore some techniques that can help you achieve this.
- Techniques for creating depth in sky painting
Creating depth in sky painting involves using color, tone, and perspective. Here are some techniques:
- Color Gradient: Use a gradient of colors, from dark at the top to light at the horizon, to create the illusion of depth.
- Atmospheric Perspective: Objects in the distance, like far-off clouds, should be painted less distinctly than those in the foreground. This creates a sense of distance.
- Size and Placement: Larger objects appear closer, while smaller ones seem further away. Place larger clouds lower in the sky to enhance this effect.
Remember, practice is key to mastering these techniques. Don’t be afraid to experiment and learn from your mistakes.
- How to add dimension to your sky paintings
Adding dimension to your sky paintings can make them more realistic and visually interesting. Here’s how:
- Texture: Use your brush to create texture in the clouds and sky. This can give your painting a three-dimensional feel.
- Shadows and Highlights: Use dark colors for shadows and light colors for highlights to create a sense of volume in your clouds.
- Layering: Paint the sky in layers, starting with the background and working your way to the foreground. This can create a sense of depth and dimension.
Again, practice and experimentation are your best teachers. Don’t be afraid to try new techniques and push your boundaries.
By mastering these techniques, you can create sky paintings that are not only beautiful but also full of depth and dimension. Remember, the sky is not just a backdrop, but a vital part of your landscape that can convey mood, time of day, and even weather conditions. So, take your time, practice, and most importantly, enjoy the process!
Landscape Oil Painting Techniques
Mastering the art of landscape oil painting can be a rewarding experience. It allows you to capture the beauty of the natural world and express your creative vision. In this section, we will explore techniques to create realistic landscapes and add detail to your paintings.
Creating Realistic Landscapes
Creating realistic landscapes in oil requires a combination of observation, technique, and a deep understanding of your materials. Here are some steps to guide you:
- How to paint realistic landscapes in oil: Start by sketching your landscape onto the canvas. This will serve as a guide for your painting. Next, block in the main areas of color with a thin layer of oil paint. This is known as the ‘underpainting’. Once this layer is dry, you can start to build up layers of paint, adding detail and texture as you go. Remember to always paint from dark to light, and from thin to thick layers of paint.
- Techniques for adding detail to your landscape paintings: To add detail to your landscape paintings, use smaller brushes and thinner paint. You can create the illusion of distance by making objects in the background less detailed and lighter in color. Use a palette knife to create texture in areas like grass and tree bark. Remember, it’s the small details that can make a big difference in your painting.
By following these techniques, you can create landscape oil paintings that are realistic and full of life. Remember, practice is key. The more you paint, the better you will become at capturing the beauty of the natural world.
Integrating the Sky into Your Landscape
One of the most challenging yet rewarding aspects of landscape oil painting is the integration of the sky into your landscape. The sky is not just a backdrop; it’s an integral part of the composition that can dramatically influence the mood and depth of your artwork. Let’s explore how to seamlessly integrate the sky into your landscape paintings and the techniques for blending the sky and land together.
- How to seamlessly integrate the sky into your landscape paintings
- Techniques for blending the sky and land together
Successfully integrating the sky into your landscape painting requires careful planning and execution. Start by sketching the overall composition of your painting, including the position and shape of the sky. The sky should not be an afterthought; it should be a part of your initial composition.
When painting the sky, consider the time of day and weather conditions you want to depict. The colors and patterns in the sky can dramatically change depending on these factors. For example, a sunset might feature vibrant oranges and purples, while a cloudy day might have a more muted palette.
Remember to keep the perspective in mind. The sky appears lighter and less saturated as it nears the horizon. This is due to atmospheric perspective, a phenomenon where objects appear less distinct and more bluish the farther they are from the viewer. By incorporating this effect into your painting, you can create a more realistic and immersive landscape.
Blending the sky and land together in a landscape painting can be a challenging task. However, with the right techniques, you can create a seamless transition between these two elements.
One effective technique is to use a soft brush to lightly blend the colors where the sky meets the land. This can create a smooth transition and give the impression of a distant horizon. Be careful not to overblend, as this can result in a muddy appearance.
Another technique is to use the colors from the sky in the land and vice versa. For instance, if you have a blue sky, you might incorporate some blue into the shadows on the land. This can help to unify your painting and create a harmonious color scheme.
Remember, the key to successful sky and land integration is observation. Spend time studying the sky and how it interacts with the landscape in different lighting conditions. This will give you a better understanding of how to depict this relationship in your paintings.
Oil Painting Inspiration
Every artist, whether a beginner or an expert, sometimes struggles to find inspiration for their next masterpiece. This section will guide you on how to find inspiration for your oil paintings and how to stay motivated and creative.
-
Finding Inspiration for Your Oil Paintings
Artists find inspiration in various ways. Some are inspired by nature, others by people, emotions, or even dreams. The key is to keep your mind open and receptive.
Here are a few tips to help you find inspiration:
- Observe: Look around you. Nature, people, buildings, or even a simple object could spark an idea.
- Travel: New places and cultures can provide a wealth of inspiration. If you can’t travel, explore the world through books or the internet.
- Experiment: Try different styles, techniques, and mediums. Each experiment can lead to new ideas.
- Learn: Study the works of other artists. You can learn a lot from their techniques and perspectives. Check out the list of famous painters on Wikipedia for a start.
-
Artistic Inspiration: How to Stay Motivated and Creative
Staying motivated and creative can be a challenge, especially when you’re facing a creative block. Here are some strategies to help you stay inspired:
- Set Goals: Having a clear goal can keep you motivated. It could be mastering a new technique or creating a certain number of paintings.
- Practice Regularly: Like any skill, the more you practice, the better you become. Regular practice also keeps your creative juices flowing.
- Join a Community: Joining a community of artists can provide support, feedback, and inspiration. You can share ideas, learn from others, and get constructive criticism.
- Take Breaks: Sometimes, the best ideas come when you’re not trying. Take regular breaks to relax and recharge.
Remember, inspiration is everywhere. You just need to be open to it. And even when you’re not feeling inspired, keep painting. You never know when inspiration will strike next.
Case Studies of Famous Sky Paintings
Let’s dive into some of the most famous paintings of the sky, examining the techniques used by the artists and how they approached the task of capturing the beauty of the heavens on canvas.
- Examining famous sky paintings and their techniques
One of the most famous sky paintings is “The Starry Night” by Vincent van Gogh. This masterpiece, painted in 1889, is known for its swirling, vibrant depiction of the night sky. Van Gogh used thick, heavy brushstrokes to create texture and movement in the sky, giving it a sense of depth and dynamism. The stars are not just dots on the canvas; they are radiant orbs that seem to pulse with light. You can learn more about this painting on its Wikipedia page.
Another iconic sky painting is “Sunrise” by Claude Monet. This 1872 painting is credited with starting the Impressionist movement. Monet used loose brushstrokes and a palette of soft, pastel colors to capture the fleeting beauty of a sunrise. The sky in this painting seems to shimmer and change before your eyes, just like a real sunrise. For more information, visit the Wikipedia page.
- How famous artists have approached sky painting
Many famous artists have tackled the challenge of painting the sky, each with their unique approach. Van Gogh, for example, was known for his expressive, emotional approach to sky painting. He used color and brushstroke to convey his feelings and perceptions, rather than trying to create a realistic depiction of the sky.
Monet, on the other hand, was more interested in capturing the changing light and color of the sky at different times of day. He would often paint the same scene multiple times, each time under different lighting conditions, to capture the subtle changes in the sky’s appearance.
These case studies show that there is no one “right” way to paint the sky. Each artist brings their unique perspective and technique to the task, resulting in a wide variety of beautiful and inspiring sky paintings.
Conclusion: Mastering the Sky
As we reach the end of our journey through the art of oil painting, specifically focusing on capturing the beauty of the sky, it’s essential to reflect on what we’ve learned and look forward to how we can continue to grow as artists. Let’s summarize the key takeaways and discuss how you can continue your journey in oil painting.
- Key takeaways for mastering sky painting in oil
- Understanding the basics of oil painting is crucial. This includes knowing your materials, such as different types of brushes, oils, and canvases, and how to use them.
- Observation is key. Paying close attention to the sky’s color, texture, and movement can help you capture its essence on canvas.
- Advanced techniques like glazing and scumbling can add depth and realism to your sky paintings.
- Studying famous sky paintings can provide inspiration and insight into different techniques and styles.
- Continuing your journey in oil painting
- Practice regularly. The more you paint, the better you’ll get.
- Don’t be afraid to experiment. Try new techniques, styles, and subjects to broaden your skills and find your unique voice as an artist.
- Seek feedback. Joining a local art community or online forum can provide valuable critique and encouragement.
- Never stop learning. Read books, attend workshops, and study the works of masters to continually grow your knowledge and skills.
Mastering the art of sky painting in oil is a journey that requires patience, practice, and a keen eye for detail. Here are the key takeaways:
Art is a lifelong journey, and there’s always more to learn and explore. Here’s how you can continue your journey in oil painting:
In conclusion, mastering the sky in oil painting is a rewarding challenge that can add a new dimension to your artwork. Remember, every artist was once a beginner, so don’t be discouraged if your early attempts don’t turn out as you’d like. With patience, practice, and persistence, you’ll soon be painting skies that take the viewer’s breath away.