Introduction to Painting Mediums
Hey there, budding artist! Welcome to the colorful world of painting mediums. Before we dive in, let’s understand what a painting medium is. It’s the stuff that carries the color in your paint, and it can make a big difference in how your artwork turns out. So, let’s get started!
- Understanding the importance of choosing the right medium
- Overview of oil and acrylic paints
So, whether you’re a fan of the slow and steady oil paints, or the quick and versatile acrylics, understanding your medium is the first step to creating a masterpiece. Stay tuned as we delve deeper into these mediums in the coming sections. Happy painting!
Oil Painting Techniques
Oil painting is a fantastic medium that has been loved by artists for centuries. It offers a wide range of techniques and possibilities that can turn a blank canvas into a masterpiece. Let’s dive into the world of oil painting!
Oil Painting for Beginners
Starting with oil painting might seem daunting, but don’t worry! We’re here to guide you through the basics and introduce you to some famous artists who have mastered this medium.
- Introduction to basic oil painting techniques
- Case study: Famous artists who use oil painting techniques
So, grab your brushes and paints, and start your journey into the wonderful world of oil painting. Remember, practice makes perfect, and every artist has their unique style. Happy painting!

Advanced Oil Painting Techniques
Let’s dive into the fascinating world of advanced oil painting techniques. These methods can add depth and texture to your artwork, making it more captivating and unique. Remember, practice makes perfect, so don’t be afraid to experiment and make mistakes along the way!
- Exploring advanced techniques in oil painting
Advanced oil painting techniques can truly elevate your artwork. Let’s explore some of these techniques:
- Glazing: This involves applying a thin, transparent layer of paint over a dried, existing layer. This technique can add depth and luminosity to your painting. Check out Wikipedia for more information on glazing.
- Impasto: This is where you apply paint thickly, so it stands out from the surface. This technique can add a 3D effect to your painting. Visit Wikipedia to learn more about impasto.
- Scumbling: This involves applying a thin, opaque layer of paint over a dried layer. This technique can create a soft, hazy effect. You can learn more about scumbling on Wikipedia.
- Examples of advanced oil painting artworks
Now, let’s look at some examples of artworks that utilize these advanced oil painting techniques:
- “Sunflowers” by Vincent Van Gogh: This famous painting showcases the impasto technique, with thick layers of paint creating a 3D effect. You can view it on Wikipedia.
- “Mona Lisa” by Leonardo da Vinci: Da Vinci used the glazing technique to create depth and luminosity in this iconic painting. Check it out on Wikipedia.
- “The Hay Wain” by John Constable: Constable used the scumbling technique to create a soft, hazy effect in this landscape painting. You can view it on Wikipedia.
Remember, these techniques are just tools in your artist’s toolbox. The real magic comes from how you use them to bring your vision to life. So, grab your brushes and start experimenting!
Acrylic Painting Methods
Acrylic paints are a fantastic medium for artists of all levels. They’re versatile, easy to use, and come in a rainbow of vibrant colors. Let’s dive into the world of acrylic painting methods and discover how they can bring your artwork to life!
Acrylic Painting for Beginners
If you’re new to the world of acrylic painting, don’t worry! We’re here to guide you through the basics and get you started on your artistic journey.
- Introduction to basic acrylic painting methods
- Washing: This technique involves thinning the paint with water and applying it in a way that resembles watercolor.
- Stippling: This involves using the tip of your brush to create small dots of paint, which can create interesting textures and patterns.
- Dry brushing: This technique involves using a dry brush and a small amount of paint to create a rough, textured effect.
- Case study: Famous artists who use acrylic painting methods
Acrylic painting is a fun and versatile medium that’s perfect for beginners. With a bit of practice, you can master these basic techniques and start creating your own acrylic masterpieces. So grab your paints, brushes, and canvas, and let’s get started!
Advanced Acrylic Painting Methods
Now that we’ve covered the basics, let’s dive into some more advanced acrylic painting methods. These techniques can help you take your artwork to the next level!
- Exploring advanced techniques in acrylic painting
Advanced acrylic painting techniques can add depth and texture to your artwork. Here are a few methods you might want to try:
- Glazing: This involves applying a thin, transparent layer of paint over a dry, existing layer. It can help you achieve a luminous, glowing effect in your paintings. Learn more about glazing here.
- Impasto: This is a technique where paint is applied in thick layers, creating a three-dimensional effect. You can achieve this with acrylics by using a palette knife or a thick brush. Check out more on impasto here.
- Scumbling: This involves applying a thin, opaque layer of paint over a dry layer. It can add depth and complexity to your artwork. Learn more about scumbling here.
- Examples of advanced acrylic painting artworks
Here are some examples of artworks that use advanced acrylic painting techniques:
- “The Sunflower” by Vincent Van Gogh: Van Gogh used the impasto technique to create thick, textured layers of paint in this famous artwork. Check out “The Sunflower” here.
- “The Persistence of Memory” by Salvador Dali: Dali used glazing to create a glowing effect in this iconic painting. See “The Persistence of Memory” here.
- “The Starry Night” by Vincent Van Gogh: Van Gogh used scumbling to add depth and complexity to this famous painting. Check out “The Starry Night” here.
By exploring these advanced techniques, you can create more complex and interesting acrylic paintings. So, why not give them a try?
Difference Between Oil and Acrylic Paint
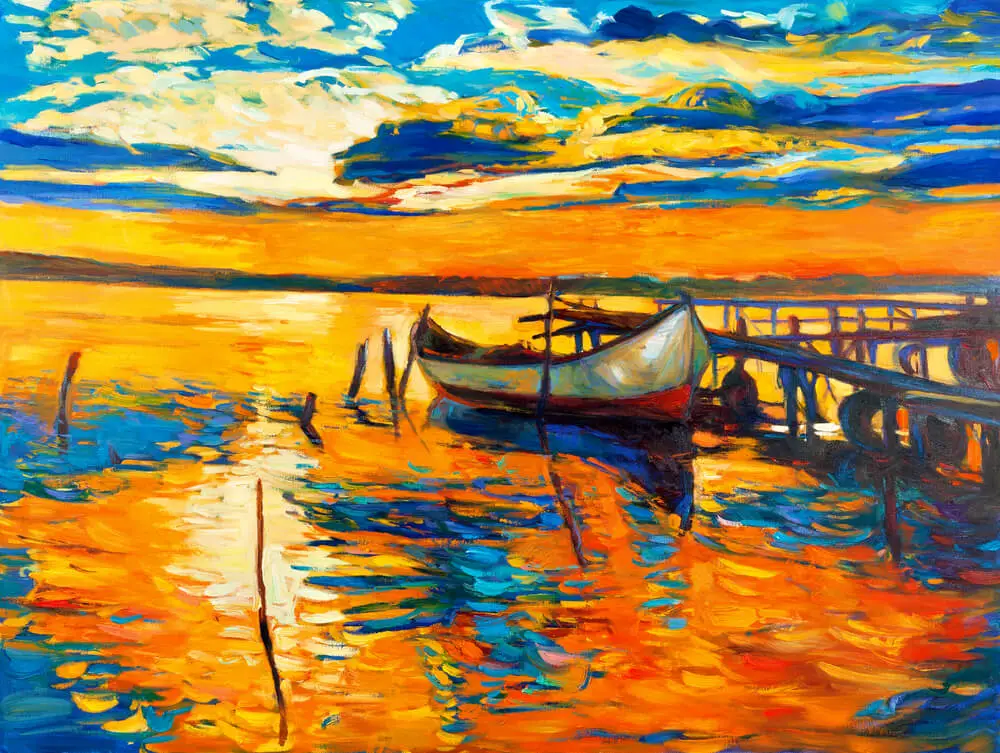
When it comes to painting, the medium you choose can make a world of difference. Today, we’re going to dive into the differences between oil and acrylic paint. Both have their unique properties, and knowing these can help you choose the right one for your artwork.
- Comparison of oil and acrylic paint properties
Oil and acrylic paints may look similar, but they have different properties that can affect your painting process and the final result.
| Properties | Oil Paint | Acrylic Paint |
|---|---|---|
| Drying Time | Slow (days to weeks) | Fast (minutes to hours) |
| Texture | Smooth and glossy | Flat and matte |
| Flexibility | Less flexible, can crack over time | Highly flexible, resistant to cracking |
| Color Vibrancy | Rich and deep | Bright and bold |
| Workability | Remains workable for longer periods | Dries quickly, less workable over time |
As you can see, oil paints take a long time to dry, which can be a benefit if you like to take your time with your artwork. They also have a smooth, glossy texture and rich, deep colors. However, they are less flexible than acrylic paints and can crack over time.
On the other hand, acrylic paints dry quickly, which can be great if you’re in a hurry. They have a flat, matte texture and bright, bold colors. Plus, they’re highly flexible and resistant to cracking. But they dry quickly, which means they’re less workable over time.
- Key takeaways: Choosing between oil and acrylic paint
So, which one should you choose? Well, it depends on your personal preferences and the type of artwork you want to create.
- If you enjoy taking your time with your artwork and love the rich, deep colors and smooth, glossy texture, then oil paint might be the right choice for you.
- If you prefer a paint that dries quickly, has bright, bold colors, and a flat, matte texture, then you might want to go with acrylic paint.
Remember, there’s no right or wrong choice here. It’s all about finding the paint that works best for you and your art. So, don’t be afraid to experiment and try both to see which one you prefer!
Oil vs Acrylic Durability
Let’s dive into the world of paints! Specifically, we’re going to talk about the durability of oil and acrylic paints. Which one lasts longer? Which one stands up better to the test of time? Let’s find out!
- Understanding the durability of oil paints
Oil paints have been around for centuries, and for a good reason. They’re known for their rich, vibrant colors and long-lasting durability. Oil paints dry slowly, which allows artists to work with them for longer periods. Once dry, they create a hard, protective layer that can withstand the elements. This is why many old masterpieces painted with oil paints are still in great condition today. However, they can crack or yellow over time if not properly cared for.
- Understanding the durability of acrylic paints
Acrylic paints, on the other hand, are a more modern invention. They dry quickly and are water-resistant once dry. This makes them a popular choice for artists who work quickly or in layers. Acrylic paints are also known for their durability. They resist fading and hold up well to light exposure. However, they can sometimes peel or flake over time, especially if applied in thick layers.
- Comparison of oil and acrylic paint durability
So, which is more durable, oil or acrylic paint? The answer isn’t as straightforward as you might think. Both types of paint have their strengths and weaknesses. Oil paints are known for their longevity, but they can crack or yellow over time. Acrylic paints resist fading and are water-resistant, but they can peel or flake if not properly applied or cared for.
In the end, the durability of your artwork depends not only on the type of paint you use but also on how you apply it and care for it. So, whether you choose oil or acrylic paint, make sure to follow the manufacturer’s instructions and take good care of your artwork!
Painting with Oil Paints
Oil painting is a fantastic way to express your creativity. It’s a bit different from other types of painting, but don’t worry! We’re here to guide you through the process. Let’s dive in!
- Step-by-step guide to painting with oil paintsOil painting might seem a bit intimidating at first, but once you get the hang of it, it’s a whole lot of fun. Here’s a simple step-by-step guide to help you get started:
- Choose your subject: This could be anything from a beautiful landscape to a bowl of fruit. The choice is yours!
- Prepare your canvas: Apply a layer of gesso to your canvas to make it ready for painting.
- Sketch your subject: Use a pencil to lightly sketch your subject onto the canvas.
- Start painting: Begin with the darkest colors and work your way up to the lightest.
- Let it dry: Oil paints take longer to dry than other types of paint, so be patient.
- Add details: Once your painting is dry, you can add in the finer details.
- Key takeaways: Tips for painting with oil paintsNow that you know the basic steps, here are some handy tips to keep in mind when painting with oil paints:
- Take your time: Oil paints dry slowly, so you have plenty of time to perfect your painting.
- Mix your colors: You can create a whole range of colors by mixing your oil paints together.
- Use the right brushes: Different brushes create different effects, so experiment to see what works best for you.
- Clean your brushes: Always clean your brushes after use to keep them in good condition.
- Protect your artwork: Once your painting is dry, apply a layer of varnish to protect it.
Painting with Acrylic Paints
Acrylic paints are a popular choice for many artists due to their versatility and ease of use. Let’s dive into the world of acrylic painting and learn how to create your own masterpiece!
- Step-by-step guide to painting with acrylic paints
Follow these simple steps to create your own acrylic painting:
- Gather your materials: You’ll need acrylic paints, brushes, a palette, a canvas, and a cup of water.
- Prepare your workspace: Cover your workspace with newspaper or a drop cloth to protect it from paint spills. Make sure you have good lighting and ventilation.
- Sketch your design: Use a pencil to lightly sketch your design on the canvas. Don’t worry if it’s not perfect – you can always paint over it!
- Start painting: Dip your brush in water, then in the paint. Apply the paint to the canvas, starting with the largest areas and working your way down to the smaller details. Remember to clean your brush in the water cup when switching colors.
- Let it dry: Acrylic paint dries quickly, but it’s best to wait at least 24 hours before touching your painting or adding any final touches.
- Seal your painting: Once your painting is completely dry, you can apply a clear acrylic sealer to protect it and give it a glossy finish.
- Key takeaways: Tips for painting with acrylic paints
Here are some tips to help you get the most out of your acrylic painting experience:
- Keep your paints wet: Acrylic paints dry quickly, so keep a spray bottle of water handy to keep your paints moist on the palette.
- Work quickly: Because of the fast drying time, you’ll need to work quickly when blending colors on the canvas.
- Experiment with mediums: Acrylic mediums can be added to the paint to change its consistency, drying time, and finish. Don’t be afraid to experiment!
- Practice makes perfect: Like any skill, the more you practice, the better you’ll get. Don’t be discouraged if your first few paintings don’t turn out the way you want – keep trying!
Remember, the most important thing is to have fun and enjoy the process of creating. Happy painting!
Oil Paint Drying Time
When it comes to painting with oil paints, one of the most important things to understand is the drying time. Unlike other types of paint, oil paint takes a bit longer to dry. But don’t worry! This can actually be a good thing. Let’s dive in and learn more about oil paint drying time.
- Understanding Oil Paint Drying Time
- How to Manage Oil Paint Drying Time
- Layering: Start with thin layers of paint and gradually build up. Thin layers will dry faster than thick ones.
- Use a drying medium: There are certain mediums available that can speed up the drying time of oil paint. Just mix a bit into your paint before you start.
- Temperature and Humidity: Oil paint dries faster in a warm and dry environment. So, if you’re in a hurry, try to paint in such conditions.
Acrylic Paint Drying Time
Let’s dive into the world of acrylic paint, specifically focusing on its drying time. This is a key factor that can greatly influence your painting process and the final outcome of your artwork.
- Understanding acrylic paint drying time
- How to manage acrylic paint drying time
- Work in thin layers: Thinner layers of paint dry faster, allowing you to build up your painting quickly.
- Use a palette: A palette can help keep your paint wet for longer. You can also spray a light mist of water over your palette to prevent the paint from drying out.
- Use a slow-drying medium: There are special mediums available that can slow down the drying time of acrylic paint, giving you more time to work with it.
- Control your environment: If possible, try to work in a cool, humid environment. Heat and dry air can speed up the drying time of acrylic paint.
Remember, understanding and managing the drying time of acrylic paint can significantly improve your painting process. So, don’t be afraid to experiment and find what works best for you!
Conclusion: Choosing the Best Medium for Your Art
As we wrap up this informative journey through the world of painting mediums, let’s take a moment to recap and reflect on what we’ve learned about oil and acrylic paints. Remember, the best medium for your art is ultimately the one that best suits your personal style and creative vision.
- Recap of oil vs acrylic paints:
- Final thoughts on choosing the best medium for your art:
Whether you choose oil or acrylic paints, remember that art is a journey of self-expression. So, don’t be afraid to experiment, make mistakes, and, most importantly, have fun with it. As the famous artist Pablo Picasso once said, “Every child is an artist. The problem is how to remain an artist once we grow up.” So, keep exploring, keep learning, and keep creating. Happy painting!
