Hey there, budding artists! Welcome to our fun and easy-to-understand guide on oil paint terms. This is your first step towards becoming an oil painting pro. So, let’s dive in!
- Understanding the Importance of Oil Paint Terms
Imagine trying to bake a cake without knowing what “baking powder” or “whisk” means. It would be pretty tough, right? The same goes for oil painting. Knowing the lingo is key to mastering the art. It’s like your secret decoder ring to understanding tutorials, classes, and even art critiques. Plus, it’ll make you sound super smart when you’re talking about your art!
- How This Glossary Can Help You Master Oil Painting Techniques
Our glossary is like your personal art tutor. It’s here to help you understand all those fancy terms that artists use. But it’s more than just a dictionary. Each term comes with a simple explanation and a handy tip or trick. So, you’re not just learning words, you’re learning how to use them in your art. It’s like getting a toolbox and a manual all in one!
So, are you ready to start your journey towards mastering art? Let’s get painting!
Oil Paint Definitions: The Basics
Before we dive into the world of oil painting, let’s get to know some basic terms. Understanding these will help you get a better grasp of the art form and its processes.
Understanding Oil Paint: The Core Ingredients
Oil paint is like a delicious cake. It’s made up of different ingredients that all work together to create something beautiful. Let’s take a look at the three main ingredients of oil paint: pigment, binder, and solvent.
- Definition and role of pigment in oil paint
- Understanding binders: The role of oil
- Importance of solvents in oil paint
Now that we’ve covered the basics, you’re well on your way to understanding the world of oil painting. Remember, the best way to learn is by doing, so don’t be afraid to get your hands dirty and start creating!
Fundamentals of Oil Painting
Glossary for Oil Paint: Key Terms Explained
Let’s dive into the world of oil painting and explore some key terms that every artist should know. These terms will help you understand the process of oil painting better and enhance your skills.
Oil Paint Terminology: A-Z
- Alkyd: This is a type of synthetic resin used in oil paints to speed up drying time. Alkyd paints are often used by artists who want their artwork to dry quickly. They are also known for their durability and flexibility. Learn more about Alkyd here.
- Brushwork: This term refers to the way an artist uses their brush when painting. Different brushwork techniques can create different effects on the canvas. For example, smooth brushwork can create a calm and serene feel, while rough brushwork can create a sense of movement and energy.
- Glazing: Glazing is a technique in oil painting where thin layers of transparent paint are applied over a dried, opaque layer of paint. This allows the artist to create a rich, luminous color and depth in their artwork. Learn more about Glazing here.
- Impasto: Impasto is a technique used in painting where paint is laid on an area of the surface very thickly, usually thick enough that the brush or painting-knife strokes are visible. This technique adds texture and dimension to the painting. Learn more about Impasto here.
- Underpainting: Underpainting is the first layer of paint applied to a canvas, which serves as a base for other layers of paint. It sets the tone and overall color scheme for the entire painting. Learn more about Underpainting here.
Understanding these key terms can help you navigate the world of oil painting with more confidence and skill. So, grab your brushes and let’s start painting!
Understanding Oil Paint: Techniques and Styles
Oil painting is a fascinating world of colors and textures. It’s like a playground where you can experiment with different techniques to create your unique style. Let’s dive deep into some popular oil painting techniques and learn how to master them.
Oil Painting Techniques: A Deep Dive
There are countless ways to apply oil paint to a canvas, but we’ll focus on three popular techniques: Glazing, Impasto, and Scumbling. Each of these techniques can add a unique touch to your artwork.
- Glazing: How to master this technique
- Always start with a dry layer of paint. This is important because the glaze needs to be applied over a dry layer to create the desired effect.
- Use a thin, transparent layer of paint for the glaze. You can thin your paint with a medium like linseed oil or turpentine.
- Apply the glaze evenly with a soft brush. Be patient and take your time to ensure a smooth application.
- Impasto: Tips for creating texture
- Use a palette knife or a thick brush to apply the paint. These tools can help you create bold strokes and add texture to your painting.
- Don’t be afraid to use a lot of paint. The more paint you use, the more texture you can create.
- Let your paint dry between layers. This can help you build up texture and prevent the colors from mixing.
- Scumbling: The art of creating softness
- Start with a dry layer of paint. Just like with glazing, the scumbling technique requires a dry base layer.
- Use a dry brush to apply the paint. This can help you create a soft, diffused effect.
- Blend the paint gently. Don’t press too hard or you might remove the base layer of paint.
Remember, practice makes perfect. So, don’t be discouraged if your first attempts don’t turn out as you expected. Keep experimenting with these techniques and you’ll soon be creating stunning oil paintings!
Oil Paint Guide: Case Studies
Let’s dive into some real-life examples of artists who have mastered the art of oil painting. These case studies will give you a glimpse into their journey, the techniques they used, and how they achieved success.
Mastering Art: Success Stories
- Case Study 1: Mastering Glazing TechniqueMeet Sarah, a self-taught artist who fell in love with the glazing technique. Glazing involves applying a thin, transparent layer of paint over a dry, previously painted area. Sarah started by experimenting with different colors and layers. After months of practice, she was able to create a stunning portrait with a depth and luminosity that was breathtaking. She attributes her success to patience and the understanding that glazing is a slow process, but the results are worth the wait. Learn more about the glazing technique here.
- Case Study 2: The Art of ImpastoNext, we have John, a professional artist known for his use of the impasto technique. Impasto is a technique used in painting, where paint is laid on an area of the surface very thickly, usually thick enough that the brush or painting-knife strokes are visible. John’s paintings are characterized by thick, textured strokes that give a three-dimensional effect. His advice to budding artists is to not be afraid of using paint generously and to embrace the texture it creates. Find out more about impasto here.
- Case Study 3: Success with UnderpaintingFinally, let’s look at Emily’s story. Emily is an artist who swears by the underpainting technique. Underpainting is a method where an initial layer of paint is applied to a canvas or board and allowed to dry before applying the final color. Emily believes that underpainting helped her to establish the overall tone of her paintings and improved her color accuracy. Her tip for success is to choose the underpainting color carefully as it can significantly impact the final outcome. Learn more about underpainting here.
Oil Paint Materials Glossary: Beyond the Paint
When it comes to oil painting, the paint itself is just the beginning. There’s a whole world of tools and materials that can help you create your masterpiece. Let’s dive into the glossary of oil paint materials and understand the tools better.
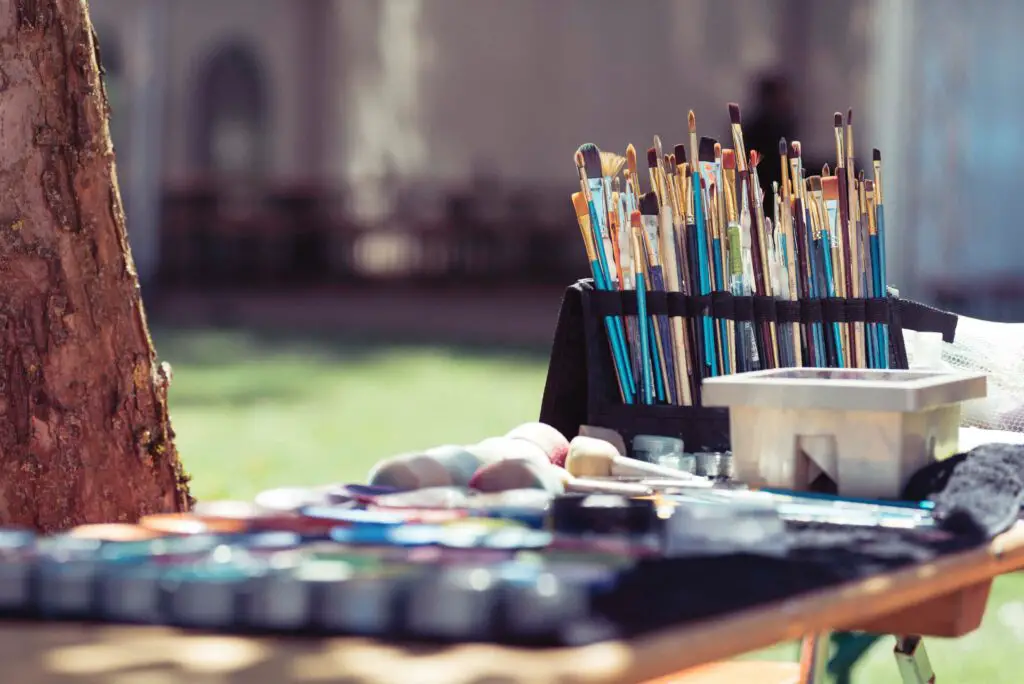
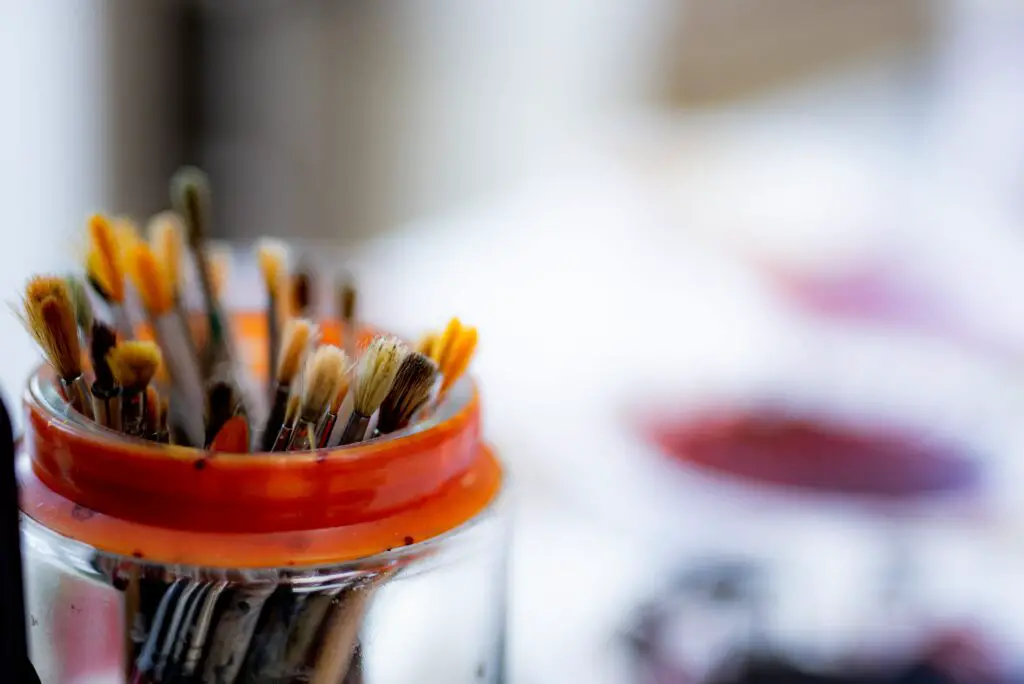
Understanding the Tools: Brushes, Palettes, and More
Oil painting requires a variety of tools, each with its own purpose and function. Let’s explore some of the most important ones.
- Brushes: Different types and their uses
- Palettes: Choosing the right one for you
- Easels: Understanding the importance of a good easel
Remember, the right tools can make your oil painting journey smoother and more enjoyable. So, take your time to understand each one and choose what works best for you. Happy painting!
Color and Hue
When I explore oil paint colors, it’s essential to understand the basics of hue. Hue refers to the dominant color family of a specific pigment or paint.
For example, a color may belong to the red, blue, or green hue family. When creating a palette for my artwork, I find it helpful to study the relationships between hues, which can be warm, cool, or neutral. By paying attention to these characteristics, I can create harmony and contrast in my pieces.
Tint and Shade
Another aspect of color theory that I incorporate into my work with oil paints is tint and shade. Tint refers to the lightness of a hue achieved by adding white to the original pigment. Inversely, shade refers to the darkness of a hue, attained by blending the pigment with black.
By varying the tints and shades in my compositions, I can achieve depth and create visual interest.
Pigments and Chroma
As for pigments, they are the foundation of any oil paint and play a significant role in the appearance of the final artwork. In my experience, it’s crucial to select pigments with high chroma —or color intensity— to make my artwork stand out.
Some pigments have naturally high chroma, while others require mixing or layering to achieve an intense color. In my practice, I often refer to a color wheel to understand chromatic relationships and ensure that my pigments interact harmoniously on the canvas.
In conclusion, mastering the properties of color and pigments in oil painting is essential for artistic success. By understanding hue, tint, shade, and chroma, I can create captivating compositions that evoke emotions and captivate the viewer.
Oil Paint Mediums and Varnishes
Mediums
When it comes to oil painting, I find it important to choose the right medium. Mediums can alter the consistency, drying time, and finish of the paint. There are multiple mediums available, but I’ll stick to discussing a few of the most common ones.
- Linseed oil: This is the most widely used medium in oil painting. It adds gloss and transparency to the paint, making it suitable for glazing. It can, however, slow down the drying time of paint.
- Alkyd: By adding alkyd to the paint, I can speed up the drying time. Typically, alkyd mediums provide a smooth and glossy finish while maintaining the paint’s consistency.
- Stand oil: This medium has a thicker consistency compared to linseed oil. I use it to create a high gloss finish and to reduce flow, which helps keep brush strokes visible.
Varnishes
Once my artwork is dry, I consider applying a varnish to protect the paint and give it a desired finish. There are a few types of varnishes I commonly use:
- Gloss varnish: Gloss varnish enhances the colors and provides a shiny appearance. It’s my go-to choice when I want the colors to appear vibrant and reflective.
- Matte varnish: Matte varnish provides a subtle, non-reflective finish, and I use it when I want to downplay the reflections and glare on my painting.
- Satin varnish: This varnish offers a balance between gloss and matte. Satin varnish gives the painting a more natural and diffused appearance, so I choose it when I want a softer look.
In conclusion, the choice of mediums and varnishes can greatly impact the final appearance and preservation of an oil painting. By carefully selecting the right medium and varnish, I can create artwork that looks and lasts just the way I envision it.
Preparation and Ground
In my experience with oil painting, preparing the surface properly is essential for a successful piece of artwork. There are a few components to consider during this process, such as choosing the correct primer, canvas, and gesso, as well as deciding whether to use a wood panel or another type of ground.
When I start a new project, I first select my ground material. Many artists prefer a stretched canvas, which is flexible and lightweight. Others may choose wood panels, offering a more rigid and long-lasting surface. It’s crucial to consider the final look and feel of the artwork when selecting the right ground.
The next step is to prime the surface, typically with a layer of gesso. Gesso acts as a barrier between the ground and the oil paint, preventing the paint from seeping through and damaging the surface.
It also provides a consistent base for the paint to adhere to, giving the finished work a smooth appearance. I usually apply at least two layers of gesso, allowing each layer to dry before applying the next.
Another aspect of preparing the surface for oil painting is choosing a suitable primer. Primer helps to prevent the paint from sinking into the support and ensures proper adhesion.
There are several types of primers available, such as acrylic-based primers and traditional oil-based primers. Personally, I find that an acrylic-based primer works best for me, as it dries more quickly and is easier to clean up.
To summarize, it’s essential to:
- Select the appropriate ground material (canvas or wood panel)
- Apply gesso to create a protective barrier and smooth surface
- Choose and apply a suitable primer to your support before painting
By carefully considering these steps and using the appropriate materials, I can ensure my oil paintings have a strong foundation.
Painting Techniques
Impasto
One of my favorite techniques is impasto, where I apply thick layers of oil paint using a brush or palette knife. This technique creates texture and dimension on the canvas. I often use it in combination with alla prima, or “wet-on-wet” painting, to achieve immediacy in my work and blend colors directly on the surface. Impasto is especially suited for capturing expressive brushwork and the dynamic interplay of light and shadow.
Glazing
Another technique that I frequently use is glazing. It involves applying thin, transparent layers of oil paint on top of a previously dried layer. Glazing allows me to create a luminous, glowing effect in my paintings by building up multiple layers of color. I usually begin with an underpainting, a monochromatic base, which helps establish the overall values and composition. Then, I carefully apply glazes on top, modifying the colors and enhancing the sense of depth in my artwork.
Underpainting
As I mentioned earlier, underpainting is often the first step in my painting process. It allows me to establish the overall tonal structure and composition of my artwork before applying final layers of color. I typically use a limited color palette, focusing on the grisaille technique, which uses shades of gray to create a monochromatic underpainting. This method lays a strong foundation for the subsequent application of glazes or other techniques, and it helps me to achieve a harmonious color balance in the finished painting.
Scumbling
Finally, I often employ scumbling in my work. Scumbling involves applying a thin, opaque layer of paint over a previous layer, allowing the underlying colors and texture to show through.
This technique can be used to create a variety of visual effects, such as softening edges, modifying colors, or adding a sense of atmospheric depth. I find that scumbling works particularly well with loose brushwork, giving my paintings a rich, multi-layered appearance.
Artistic Concepts and Terms
Chiaroscuro
Chiaroscuro is an artistic technique that plays with light and shadow to create a sense of depth and volume in a painting. I have seen chiaroscuro used in many oil paintings to emphasize dramatic contrasts between light and dark areas.
This approach often enhances balance and movement within a composition, guiding the viewer’s eye around the canvas. It also contributes to the painting’s aesthetic, giving it a realistic and dynamic appearance.
Grisaille
Grisaille is a monochromatic painting technique that uses shades of gray to create artwork. I often see this method employed as an underpainting to establish the values and forms of a composition before color is applied.
Grisaille can also be used as a standalone technique to create visually striking, tonal paintings. By limiting the color palette, this approach emphasizes the balance of light and dark, enhancing the visual impact of a composition.
Example of a Grayscale Palette:
| Light Gray | Medium Gray | Dark Gray |
|---|---|---|
| 10% Black | 50% Black | 90% Black |
Plein Air
Plein air is a French term that means “in the open air.” It refers to the practice of painting outdoors, capturing the natural, ever-changing beauty of a landscape. When I paint in plein air, I feel connected to my environment and can observe the subtle nuances of light, color, and atmosphere.
This approach offers the opportunity to create a dynamic, spontaneous, and authentic representation of the scene.
While Plein air painting, I pay special attention to these elements:
- Sunlight and shadows
- Atmospheric conditions (humidity, temperature, etc.)
- Movement of elements (clouds, foliage, etc.)
By using these techniques and concepts, oil painters can create captivating works of art that explore the depths of chiaroscuro, the elegance of grisaille, and the freshness of plein air. From my experience, these methods elevate the overall aesthetic and impact of a painting.
Drying and Curing
When working with oil paints, it’s important to understand the processes of drying and curing. I find that knowing the science behind these processes allows me to adapt my painting techniques accordingly.
First, let’s talk about drying time. This refers to the period it takes for the paint’s surface to become dry to the touch. Drying time varies depending on factors such as paint thickness, temperature, humidity, and even the type of pigments used.
Some colors, like titanium white, might take longer to dry due to the nature of their pigments.
Solvent evaporation is one part of the drying process. The oil in the paint contains a solvent that holds the pigments together. As the solvent evaporates, the paint begins to “set,” becoming less prone to smudging or blending.
While the surface appears dry, the underlying layers can still be wet. This is important to be aware of as I continue adding layers to my artwork.
The second part of the drying process is oxidation. Oxidation occurs when the oil reacts with oxygen in the air, forming a stable, solid layer on the surface of the canvas.
This is a chemical reaction and takes time, usually longer than the initial solvent evaporation.
A crucial aspect of oil painting is ensuring proper curing of the paint layers. Fully cured paint has undergone not only solvent evaporation but also completed oxidation. This ensures that the paint is hard and stable, resistant to discoloration and movement over time.
Curing can take anywhere from weeks to months or even years, depending on paint thickness and environmental factors.
When working on my paintings, I must always be aware of proper drying and curing times. This knowledge empowers me to achieve the desired effects without disrupting the longevity of my artwork.
Preservation and Maintenance
In my experience as an artist, preserving and maintaining the quality of oil paintings is essential. Several techniques and materials can be used to safeguard the artwork, ensuring its longevity.
I often use varnishes as a protective coating for my oil paintings. Varnishes not only provide a barrier against dust, dirt, and other contaminants, but they also allow the brilliance of colors to shine through. There are various options available concerning finishes, including matte, satin, and glossy.
When I want a more subdued appearance, I opt for a matte finish. By using a matte varnish, I can minimize the reflections on the surface and bring out the texture and brushwork.
Remember, selecting an appropriate varnish is crucial, as it impacts the final appearance of the painting. It is vital to consider factors such as the desired level of sheen, the type of paint used, and any potential reactions between the varnish and the paint.
The application process of varnish is an essential aspect to consider. To properly apply it, I first ensure that the painting is completely dry.
Layering varnishes may be necessary to provide the desired level of protection. Be cautious not to apply too much varnish, as it can be challenging to remove when conservation is required.
In some cases, I use rabbitskin glue as a sizing agent. It provides a barrier between the painting’s support and the paint layers, preventing any unwanted reactions.
Rabbitskin glue, when properly prepared and applied, can help stabilize the paint layers, ensuring that the artwork stays intact over time. However, I should mention that modern alternatives such as acrylic-based sizings are also available and can provide similar benefits.
In conclusion, the preservation and maintenance of oil paintings are essential for ensuring the artwork’s longevity. By using varnishes, sizing agents, and appropriate techniques, my oil paintings can be enjoyed by future generations.
Frequently Asked Questions
What are the key terms in oil painting?
In oil painting, some key terms I frequently encounter are:
- Pigments: These are finely ground, colored materials that provide color to the paint.
- Binder: This is the substance that holds the pigments together, typically linseed oil.
- Medium: A substance that modifies the consistency, drying time, and finish of the paint.
- Varnish: A protective coating is applied to the finished painting to preserve and enhance the colors.
What materials are used in oil paint?
The materials I use in oil paint include pigments, binders, and sometimes solvents or mediums. Pigments provide the color, and common binders are linseed, walnut, or safflower oil. Occasionally, I use solvents like turpentine or mineral spirits to thin the paint and speed up drying times.
How do different types of oil paint affect the outcome?
Different types of oil paint can impact the final outcome of my artwork. For example, student-grade paints can have less pigmentation and may not have the same vibrancy as artist-grade paints. Additionally, using various mediums can alter drying times, glossiness, and texture.
What are the steps in creating an oil painting?
When I create an oil painting, I usually follow these steps:
- Prepare the canvas with gesso to create a smooth, consistent surface.
- Sketch the composition onto the canvas.
- Mix and apply the paint, often starting with thin, transparent layers and building up to thicker, opaque layers.
- Allow the paint to dry between layers or when adding details.
- Finish the painting with a protective layer of varnish.
How can one paint figures using oil?
To paint figures using oil, I focus on the following:
- Start with a rough sketch of the figure’s shape and position.
- Block in the basic colors and values using thin layers of paint.
- Gradually add details, paying attention to anatomy, lighting, and shadows.
- Refine the edges and transitions between colors for a more realistic appearance.
What techniques do artists use for painting faces in oil?
When painting faces in oil, I rely on several techniques to achieve a lifelike result:
- Establish the underlying structure, such as the bone structure and facial features, by blocking in basic shapes and shadows.
- Focus on the transitions between light and shadow, creating a three-dimensional appearance.
- Pay attention to color variations in the skin, adding subtle warm and cool tones as needed.
- Carefully render the eyes, nose, mouth, and other facial features with the correct proportions and placement.